Category Archives: Alchemy

Magnificent Magnolia

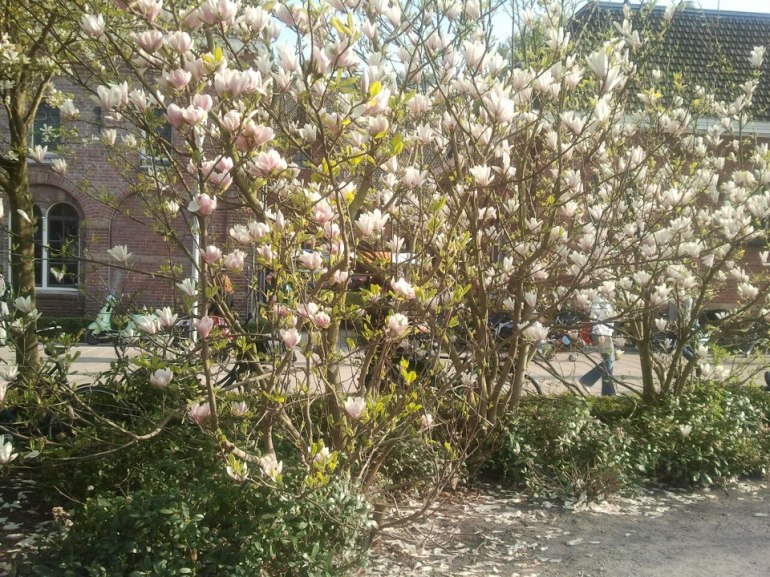
Magnolia is a tree which I fall in love with again, every year. Everything about it enthralls me. From the graceful angles of the branches, the bark, exotic blooms to the glossy evergreen leaves. A huge magnolia in bloom is a show stopper. One such tree arches quietly over the terrace behind Huize Frankendael, in Amsterdam east. Hundreds of visitors must walk beneath it without giving the tree much thought, until in March or April it explodes into bloom. There is no other tree that I would rather sit beneath and gaze up through than that magnificent magnolia in spring!

FB_IMG_15516484401208236.jpg

Edible and Medicinal Magnolia Petals
The flowers of Magnolia trees are edible and medicinal. In traditional chinese medicine, Magnolia flowers are known as Xin yi hua and are associated with the lung and stomach meridians. I enjoy eating them fresh plucked each year and happily report that they taste fragrant and spicy. I can also report that when I eat Magnolia petal, my sinuses become clear, quite like magic.

Imagine a slightly rubbery super sized rose petal which clears the sinuses a little, when you bite into it and you are getting close to the mouth feel and flavour of a magnolia petal. I like them very much and because a little goes a long way with these large petals, I can certainly recommend them to other urban herb lovers. As you may know, via my apprenticeship and walks, I teach how to harvest interesting herbs in towns and cities, in a safe and ethical way. This entails taking only a little, leaving no trace and really make the most of the harvest. Do contact me if you would like to know more – This is my passion!

Medicinal Bark
Fairly recent research suggests that Magnolia bark extract can help with oral health, stress reduction and several other disorders. In traditional medicine it is reportedly used as an antibacterial, anti-inflammatory, anticancer agent, in the treatment of Alzheimer disease, depression, diabetes, and menopause. All Magnolia species varieties are considered to possess the same medicinal qualities and there are apparently no known side effects – although we know that someone somewhere, could be allergic to the plant, so please be cautious. Magnolia Bark Extract is widely available for sale and Magnolia bark is an ingredient in many traditional Chinese medicines including Hsiao-cheng-chi-tang, Wuu-Ji-San, Heii-san, Shimpi-to, Hangekouboku-to, Masinin-gan, Sai-boku-to, Syosaiko-to, Irei-to and Goshaku-san.

Japanese traditional medicine also prizes both the bark and flowers of Magnolia. Bark harvesting is not something suggested for the urban forager because it certainly leaves a trace and it is certainly not ethical.

magnolia-westerpark-liberation-day-2013
Magnolias in Westerpark

Stealthy Petal Plucking
When harvesting from perhaps the most beautiful of city trees, one would perhaps look both foolish and anti-social to pluck entire flowers. So I suggest that you don’t. Instead, I recommend that when stumbling upon a prime Magnolia specimen in bloom, and feeling the urge to eat it, you do the following:

1. After checking for unwanted observers, wander nonchalantly up to the tree. Are the blossoms within your reach? If not move on to another.
2. If so, reach up as if to smell the fragrance of a prime bloom, pull it gently to your nose with one hand, whilst deftly plucking a single petal from its base, with the other hand whilst simultaneously inhaling the spicy aroma.
3. Tuck the plucked petal in your pocket as you gently release the bloom with your other hand.
4. Move along to another flower, as if to compare its scent with the previous bloom. Repeat steps 1 to 3 until you have harvested three or four petals.

A magnolia flower can miss one petal without much issue. If two or more petals are plucked from one bloom, evidence of foraging shows and that is not the plan. So one petal from a flower, move to another, one more petal and so on. When you have three or four petals, you are done. That is enough to make something very tasty and useful and you will have increased your stealth foraging skills..

Magnolia flower
Untouched – Delicious

Favourite Trees
I tend to forage a handful of petals each year, from 6 favourite Magnolias which are dotted around east Amsterdam. They are all growing in public spaces so stealth foraging is required. I don’t harvest from them if other people are around because apart from it just looks silly. I also limit myself to plucking a petal from two flowers per tree. I first wrote about my love of Magnolia petals on 2012. Since then urban foraging has increased in popularity so I also am careful to only pluck from Magnolias which seem not to have been visited by other foragers.


Magnolia Petal Recipes
Things that I like to do with a precious handful of magnolia petals. I hope that you have a go and let me know how you get on in the comments.

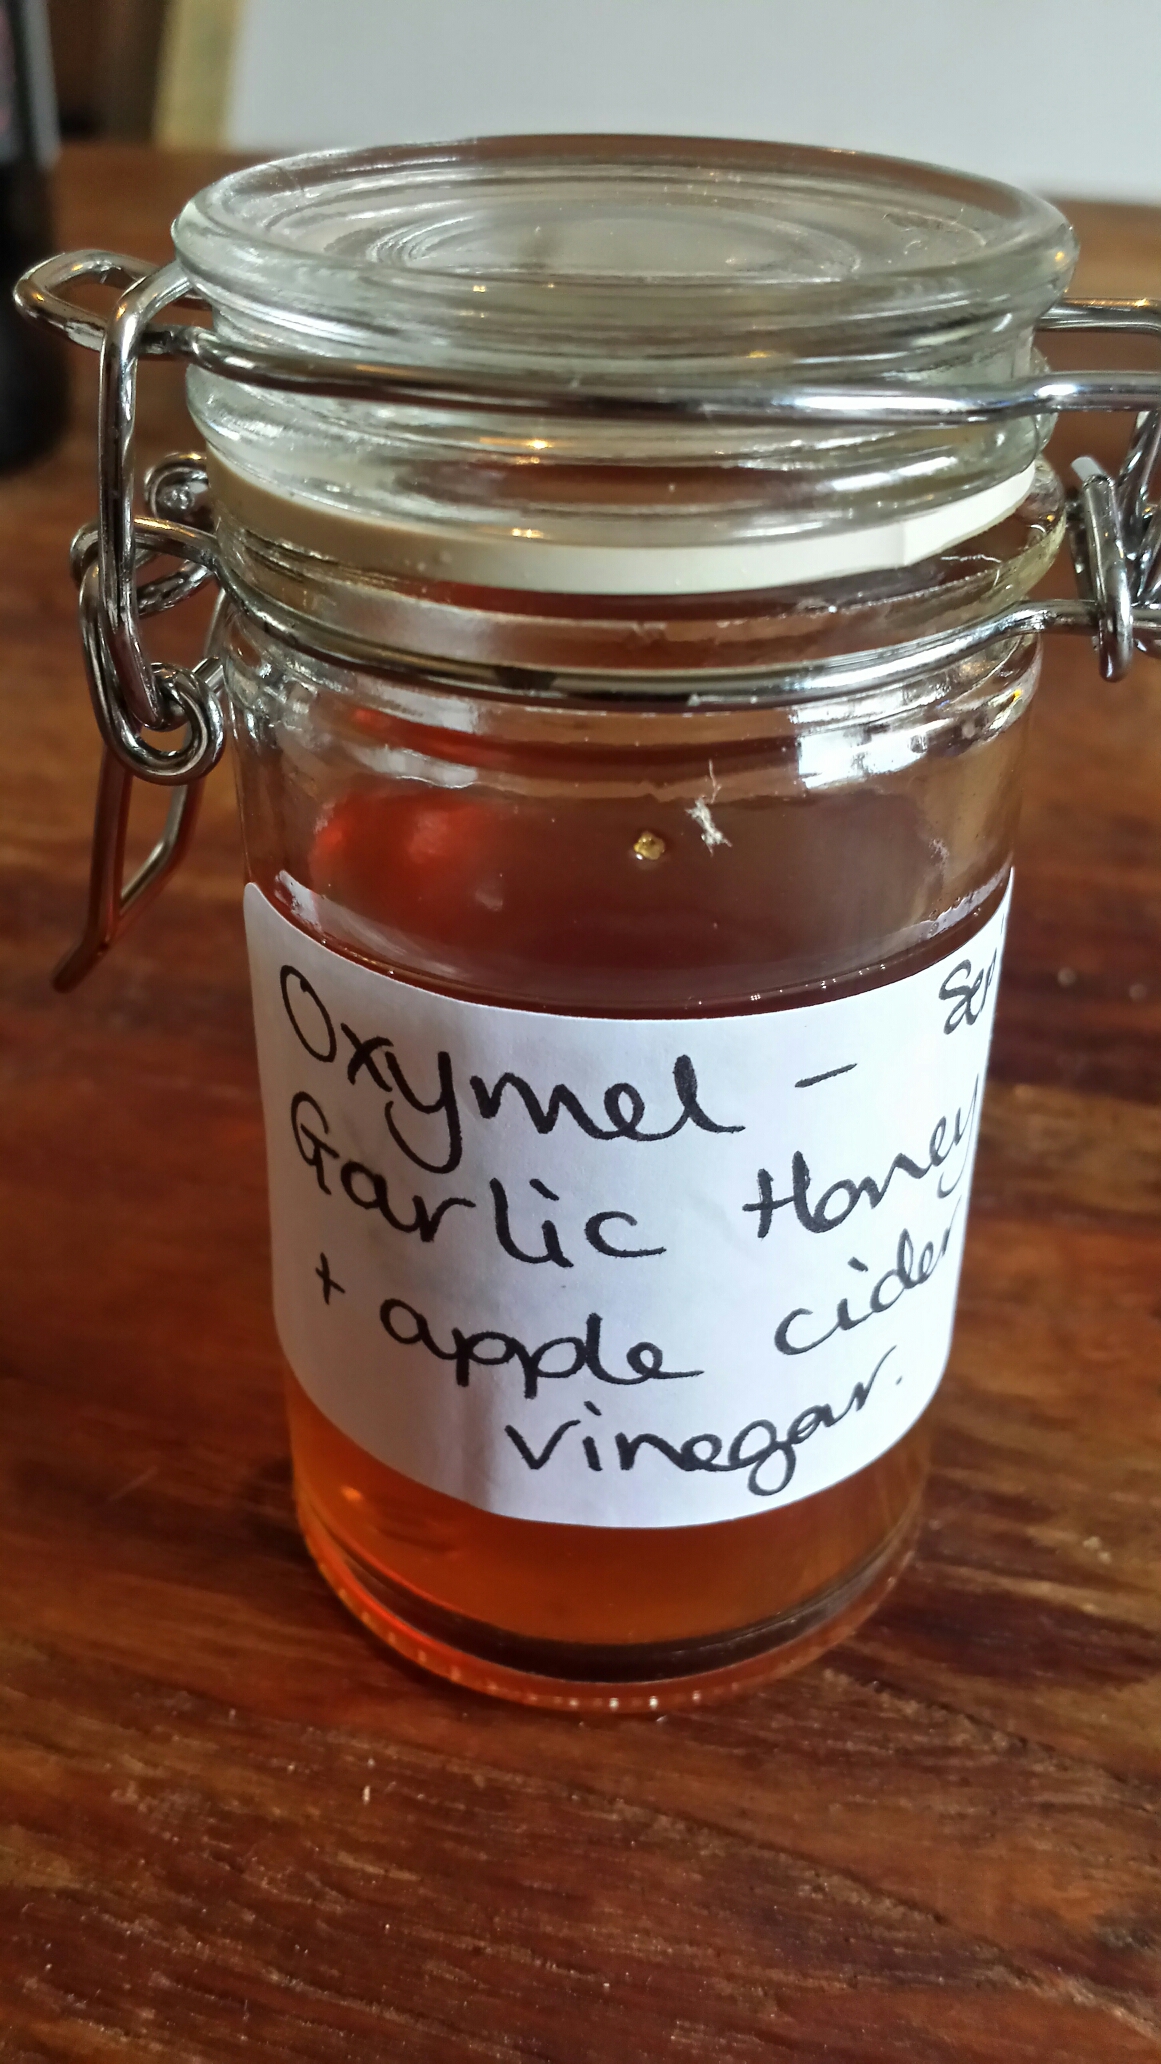
Magnolia Petal Pickle
They can be pickled, old English style by simply filling a small jar with fresh petals and then completely filling the jar again with rice wine vinegar or apple cider vinegar with a little salt and sugar to balance the flavours. I don’t add sugar or salt so I guess my version is simply Magnolia petal vinegar – I don’t mind because it tastes good 🙂

Fermented Magnolia Petals
You may like to ferment them using a little salt and water, in the style of Sandor Katz.
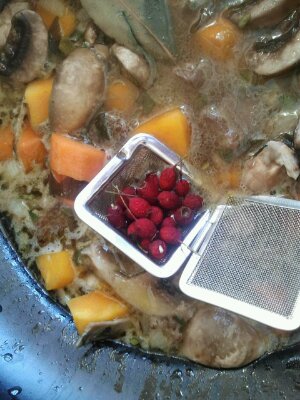
I prefer to lay them in my handy small Japanese vegetable press. I then sprinkle with a pinch of salt and apply the gentle but consistent pressure of the Japanese press for about 3 hours. This produces a very light ferment and it draws out some of the water from the petals (which tastes good too). You can leave the pressure for a lot longer if you prefer, winding the contraption every few hours to ensure the petals are in fact under a little pressure and to encourage the process.

Magnolia Petal Honey
When I first tasted a Magnolia petal and felt its clearing effect on my sinuses, I decided to transfer the petals’ properties to honey. This is soooo simple to make. It creates something which my family and friends find delicious and I hope you will too. If the honey turns you off, try Agave syrup. It works very well but in my experience is less spreadable (being rather runny).

magnolia honey
Magnolia petals infusing in honey

How to Make Magnolia Petal Honey (or use Agave syrup)
1. Gather your petals.
2. I rarely wash magnolia petals because I only harvest clean looking ones, which are from way above the ground but unsoiled by birds. You may like to wash yours. If so, then dry them off.
3. Tear the clean, surface dry petals into a sterile small glass jar. I use dishwasher cleaned pesto jars for this sort of thing.
4. Covered completely with runny honey. Use a chop stick or knitting needle to loosen trapped air bubbles. You may need to release the air and top up with honey several times. The jar should be filled to the brim with honey. The air bubbles won’t all leave the honey but prodding with chopsticks, helps them to escape and thus reduces the risk of contamination.
5. When no more air bubbles are escaping and no more honey needs to be added, close the jar tightly with its lid.
6. The constituents of the petals will infuse into the honey over the following days and weeks but the honey will take on a delicious Magnolia aroma and taste within a few hours.
7. Eat in any honey way (smear on bread, add to smoothies, mix with a little vinegar for an elixir, etc) you choose or take a teaspoon now and them to help soothe anxiety, sore throats or respiratory congestion. I don’t bother to strain this honey as I like the petal crunch. You could strain after 6 weeks if you preferred. It seems a waste of those petals though.

Please note that the herbal honey may start to ferment after a while, due to the high water content in the petals. Keep an eye on the jar, if it starts to bubble, the lid must be loosened to avoid pressure building up and the glass jar exploding. Storing it in a cool dark location will help to preserve its shelf life. Eating it all up will also avoid the problem 🙂


I hope that you get a taste for Magnolia petals this year and have a try at infusing them in honey, agave syrup, vinegar, vodka or olive oil. This herb is so beautiful, so giving and so tasty – it would be a pity to miss the fun completely wouldn’t it? I was looking at my favourite Magnolia at twilight this evening. It will open its blooms very soon and I will be waiting and thanking it for every petal.


Do you like it?
Please do add a comment about your magnolia experiences at the foot of the page or fill in the contact form. I would love to hear how you get on with magnolia and what else you are keen to learn about!


Learn Urban Herbology
If you want to learn more about foraging and using herbs in towns and cities, take a look at my apprenticeship course. I have helped hundreds of wonderful people learn about Urban Herbology over the years and I would love to help you on your journey!

Ramson mackerel spread

Urbanherbology ramson-mackerel pasteThere seems hardly time to do anything except forage and garden at the moment. Spring has truely sprung and wild garlic / ramsons (Allium ursinum) is on my menu each day! As ever,  I can’t get enough of this herb and have been experimenting with how to stretch the harvest.

Mostly, I have been preserving this spicy-pungent herb in ghee or olive oil. The infused ghee is wonderful, easy to make, versatile as a cooking ingredient and a useful ready to use remedy.  Today though, an even smellier yet wonderful flavour pairing emerged.

At lunchtime, a forgotten smoked mackerel, called out to me from my fridge. As I’m off colour at the moment, I couldn’t face eating the whole thing in one sitting but equally didn’t want to waste it.  So I set about making something simple.  Eight silken ramson leaves, lovingly plucked from the orchards on Wednesday also cried out from my fridge. I blended them together into a paste/dip/sandwich spread and the combination works, so here is my recipe for ramson-smoked mackerel paste:

1. In a bowl or food processor, thoroughly combine the bone and skin-free meat from one whole smoked mackerel, the juice of 1/2 to 1 lemon, a small handful of washed wild garlic leaves and a generous tablespoon of ghee or butter. (I used wild garlic infused ghee today).

2. Blend or mix to your desired consistency. Season to taste with salt,  pepper and perhaps extra lemon juice.

3. Transfer to a glass storage container. It should keep for a few days if refrigerated.

Do let me know if you try this recipe and if you have other ways for using wild garlic. On April 3rd I’ll be harvesting and processing more wild garlic at the spring apprenticeship gathering. Let me know if you would like to join us! Details are on my events page.


Forager’s Kefir

Aurel Chaoul taught me how to really make water kefir a couple of years ago. One beautiful Beltane evening in the River of Herbs orchards, he showed a bewitched group of us how to set up a batch. He added chewed over apple cores, squeezed out lemons, bits of ginger, a liberal amount of caster sugar and whatever else felt good at the time. I have been hooked on it since and my recipes have become more experimental as I gained confidence with those little living grains. Ginger, Turmeric and Lemon is a firm favourite, reminding me of a Balinese Jamu but taking far less time to prepare. Ginger and lemon, is rather like ginger beer and basil tastes great with most fruits. Stinging nettle infusion, fed to kefir without any sweetener is another top experimental result in this house. It tastes rather like nettle beer and can be made overnight. It’s a complete bargain, especially if you like a slightly beery taste but not the alcohol. The nettle does tend to stain the kefir grains though, not really a problem unless you don’t want nettle in your next kefir batch.

My autumn 2015 favourite is made from foraged rosehips, quince, lemon and honey. The rosehips here have been drying out whole over several weeks, on my dining room table. They looked so pretty when I harvested them and I didn’t feel like scooping out the itchy seeds for rosehip honey this year. So they sat around a candle and shriveled up gracefully. When added to the kefir brew, they perk straight back to life and look gorgeous again. Quinces are exquisite old fashioned fruits which I don’t find often in Amsterdam. However they are currently hanging in a perfectly pluckable state on a grand old tree in Frankendael orchards. Each time I garden there, I take a few home and invariably forget to cook them. They dry slowly in my fruit bowl and release an amazing pear-y fragrance, which is no bad thing. The Lemon is left over from mealtime wedges and the honey is because the kefir grains love a little sweetness to get them going. I find the combination a real pleasure to drink and it always goes down well with the orchard project volunteers.

If you enjoy experimenting with water-kefir and you like to forage, I’d love to know what your favourite combination is!

Sweet Contradiction

oxymel

Let’s face it, some herbs are hard to swallow – not because they are chewy or toxic but because they just taste sooooo strong that they make your toes curl and your hair stand on end!

One solution to the issue of strong but necessary herbal taste, is to create an Oxymel. These are delicious concoctions which take just moments to prepare and have a good storage life. They are made from herbs, honey and vinegar, having a sweet and sour taste which detracts from strong flavours. Oxy- means acid, containing oxygen or contradictory. -mel means honey.  I like to think of them as sweet contradictions. Oxymels combine the properties of the herbs, vinegar and honey from which they are made.

This morning I made some Oxymels with my Rowan apprenticeship group and the apprentices have plans to use them in salad dressings and food dips as well as for the traditional medicinal purposes. You may also like to devise pairs of herbs which work together, either culinary or medicinally. Ginger and garlic is such a combination.

The following is taken from my book which is still not finished!!

OXYMELS
Preparations of vinegar and honey, where at least one has been infused with herb.
The ratio is traditionally 5 parts honey to 1 part vinegar. A traditional method is to combine the honey and vinegar and simmer gently, along with the herb, until the mixture becomes very viscous, like treacle. However I don’t like to heat honey, I follow Ayurvedic advice never to heat it above body temperature.  I prefer to infuse the vinegar and honey separately, for 6 weeks, then to combine them and leave them runny, no need to reduce to a thick consistency. If you have only one constituent infused, the vinegar or the honey, you will also be able to make a useful oxymel. If you have neither honey or vinegar infused, you can simply set up a vinegar and honey herbal infusion and wait up to 6 weeks before straining and storing.

Recipe (with pre-infused honey and/or vinegar)
1. Simply combine 5 parts runny honey (which may be previously infused with herb and strained) and 1 part apple cider vinegar (which may be previously infused with herb and strained).
2. Store in a sterile glass jar with non-metallic lid.

Recipe with fresh herbs
(In the absence of infused herbal vinegar or honey)
1. Fill a small glass jar with chopped fresh herb.
2. Make a non-herbal oxymel using the 5:1 guidelines above (e.g. 100ml honey and 20ml apple cider vinegar). Make enough to fill the jar to the brim as your fresh herb will infuse into this liquid.
3. Pour the delicious liquid over the chopped herbs.
4. Seal jar with a non metalic lid (to prevent the vinegar oxidising the metal).
5. Store for 6 weeks and then strain through muslin into another sterile glass jar.
6. Preserve the oxymel in this glass jar with a well fitting non metallic lid.

Storage
Long term but keep an eye on it. 1 year plus.

Dosage
1 teaspoonful a few times a day, of course depending upon the herb used.

Uses
Oxymels are a very useful way to disguise herbs which have tastes which many find hard to swallow. But they have also been used for millennia to create delicious drinks and deserts. A pleasant way to take them is a tablespoon mixed with a glass of soda water or plain water.

Suggested herbs
Garlic-ginger oxymel is a tasty combination or sweet, sour and spicy. I find it handy to keep in stock for colds, flu or as a sore throat gargle.
Peppermint, Sage, Thyme, Mugwort, Hyssop, Garlic (whole cloves), Onion, Ginger, White Horehound, Rosemary – each makes a good oxymel.

As ever, note which oxymels you have made, tried and what you think of them. Also record which proportions of vinegar to honey you have tried and found best. Only use herbs which you are certain are completely safe for you to use. If you are really sick, consult a doctor! I use my oxymels for simple ailments such as tickly throats.

wpid-20150914_184145_lls.jpg

No matter how much I know that a strong bitter taste is just what I need at a cetain time, it’s often very hard to swallow unless I can soften the blow to my tastebuds. Oxymels are one way to do this. I hope you enjoy them too.

If you would like to learn more about oxymels, perhaps you would like to sign up for my Kitchen Witchery workshop on 12th October 2015.

Feeling Witchy?

Fly agaric Frankendael Park Amsterdam

I am delighted to offer a series of free-standing half day workshops to develop the magical side of your life.

Each session focuses on different ways to live in deep connection with nature and spirit, whether you are based in the city or countryside.  The workshop series (running through autumn 2015 – spring 2016) includes:

  • Kitchen witchery
  • Apartment magic
  • Enchanted gardens
  • Poisonous treasures
  • Everyday magic and
  • Natural ritual.

Turkish Hazelnut Spiral

Each session will include work with herbs, hedgerows and the seasons. Each will offer practical ideas for protection work, self development and furthering your knowledge of the natural and spiritual world. I am very excited about these workshops and hope that you will join me for one, some or all of them!

The events page on this website will show the details of each upcoming workshop. Please email (lynn.shore@gmail.com) me if you would like to reserve a space.

Spring Herbs Risotto

Fennel and Lemonbalm harvest
Freshly plucked Fennel and Lemonbalm leaves

This time of year provides a bounty of nourishing and tasty spring herbs. Here is one way that I like to cook them – a simple, no-fuss risotto.

Today I harvested two large feathery  Fennel leaves and three verdant tops of Stinging nettle (from Frankendael herb orchards). Yesterday I plucked three huge Dandelion leaves from the school garden (where I work). The dandelion leaves were wilting away in my fridge today but still taste great cooked, so those three herbs were chopped and added to the pot this evening. I could have many other herbs of course (Dead nettle, Wild garlic seedheads, Geranium and Ground ivy for instance) and I could have harvested heaps of Nettle and Dandelion leaves but there are other days, other meals, other foragers and other creatures who need those plants.  Upmost in my urban foraging mind is that by using foraged material as I would use herbs (i.e. in small amounts for culinary seasoning), I reduce my environmental impact and reduce the risk of eating contaminants and plant poisons (should they happen to be on or in the foraged plants). This is why I call my work Urban Herbology, rather than urban foraging. To find out more, do come along on one of my herb walks soon!

Lynn's Spring Herb Risotto
Lynn’s Spring Herb Risotto


Spring Herb Risotto
(makes about 2 main dish sized portions)

1/2 cup risotto rice – (non risotto rice will do, it just won’t become so creamy)
1 cup of good stock and 2 cups hot water (or 1/2 an organic chicken or vegetable stock cube in 3 cups hot water)
1 cup finely chopped seasonal fresh herbs (e.g. Fennel leaf, Dandelion, Stinging nettle).
1 small onion, finely chopped
1/2 cup frozen peas
Salt/Nori flakes/pepper/Parmesan cheese
to taste.

Method
1. Add the rice, stock and hot water to a heavy based pan.
2. Stir briefly to prevent it sticking to base of pan and bring to a boil.
3. Add chopped herbs and onion, stir and bring to boil again before reducing heat to simmer gently with lid on.
4. Simmer as per instructions for your specific rice, the dish thickens up considerably and may require lots more water, it depends on the type of rice used. My risotto rice took about 25 minutes to cook through completely and become nicely loose and creamy.
5. Whilst simmering, continue to stir briefly whenever you think about it. You may need to add a little more water to prevent stickiness.
6. When the rice is cooked through and of a good consistency, add the frozen peas to the pan. Simmer for a further 5 minutes.
7. Check and adjust seasoning (it may need a pinch of salt,nori flakes or pepper)
8. Serve with a hearty grating of Parmesan cheese if desired.

Bones, Bites and Bali

As some of you know, I fell from my bike in November and was out of action for quite some time. In short, I broke my cheek bone in several places, took quite a hit on my bum and was rather shaken up. Illness is one of the greatest teachers so naturally lessons were learned. I wrote a few of them down as the weeks went by and thought I’d emerge from hibernation today, to share some of the ways I used herbs and other things to aid recovery. I have tried to relate the story to the Wise Woman system of healing, just as I ask my apprentices to relate a health incident they have been through to the system.

Step Zero – Serenity medicine
Bali lily and water cabbage

For the first week I did nothing but allow my body to quietly sort itself out. The cut over my eye was quickly glued together in hospital as this was clearly necessary but the rest was left to calm down, in readiness for a facial reconstruction operation. No herbal ointments, no supplements, no infusions, nothing. The body’s powers of repair and regeneration are amazing. Stores of nutrients from deep within the body are called upon to fight the cause. There was clearly nothing to do except rest and sup on water, chicken soup, pumpkin soup and all manner of smoothies. The nutrients which are taken from the storehouses of the tissues must be replaced. Adding anything extra to my diet felt wrong at this point, even dangerous so I stayed away from everything other than plain food. My mental taste-buds were my guide.

Step One – Collect information
I wanted to know several things:
1. How the accident had happened. It was a mystery and this was not helping me. It took three weeks to find out that a stone or similar must have wedged between the front wheel and mudguard, stopping the bike very suddenly. Knowing helped in some ways. Knowing that I am not able to prevent this happening again didn’t help. So I researched bike helmets. That helped. More people should wear one.
2. I wanted to know about the imminent operation. Without it my sight could be lost, with it I should look normal again. Risks of anesthetic, risks of not operating. Knowing helped.
3. I believe nothing happens by chance. Why did this happen at that moment? I searched, through dreamwork and visioning. I found answers. The answers are for me. That helped. I act on my findings.
4. Shaking, why did my body persist in shaking? Shaking is a natural response to trauma and I needed to welcome it. Whole schools of therapy revolve around it. This is an interesting field!

Step Two – Energy medicine
The energetic body is an incredible part of us. It is us. When it disappears we disappear. To feel the flow of Nwyfre / prana / chi (whatever you want to name it) through a major chakra almost disappear and not return for weeks is a terrifying thing, speaking personally anyway! I was unable to correct this easily so a dear friend helped. Being aware that the energy body is out of balance is important. Knowing how to track it’s state and assist it’s return to balance is important.

Nourishing Comfrey – Boneknit

Step Three – Nourishment
Let food be thy medicine. After the operation I incorporated Oatstraw infusion into my daily diet. One liter a day. This helped to soothe my nerves (they were rather frazzled). Motherwort tincture helped in this way also. Ten drops as and when needed to bring things into perspective again. I keep a green ointment in stock here at home for all manner of skin ailments. This was very helpful after the operation. I kept it away from the broken skin and used it with intention to seep into the skin and speed the bone and flesh healing. Comfrey within the ointment came into its own as I have never felt before. So soothing, healing, scar reducing and welcome. I trusted my thoughts on when to begin using it – not before the bone setting operation, not before the skin had stopped it’s healing fluid oozing. All had calmed before I used it. I did not wash my face for three weeks and then moved onto a regime of plain tepid water, then a little ointment here and there above the breaks plus the SJW oil mentioned below. My face was cut and grazed from my eyebrow to my collarbone. All marks went quickly, except for the super glued cut (which is not surprising). What money we waste on skin care preparations!

Another thing that nourished me was friends. They helped nourish me with food, books, cards and they nourished me by making contact in whatever way felt best. Nourishment on all levels! I must nourish my friends.

Step Four – Stimulate / Sedate
When the cheekbone breaks the supplying nerve tends to be constricted and stops working so that side of the face becomes numb. This can remain permanently in some people, due to the way the bones heal, degree of nerve damage during the trauma etc. I was keen to avoid permanent nerve damage so as the bones began to feel more fixed I turned to St John’s Wort oil. This herb has an affinity to nerves and it was all I wanted on my skin other than the green ointment. Soon after I began working with the oil the nerve began to return to action. It was completely back to normal after 6 weeks.

Nadis Herb Shop, Ubud

Step Five – Supplements and Drugs
Paracetamol seemed inescapable for me in the first weeks after the accident. I took paracetamol and codeine erratically. I don’t touch them usually but I wanted help. They certainly helped with pain but it was quickly clear that they could not remove the cause of the pain. This may sound obvious and of no consequence but for me it was something of an issue.  When I took the pills I could sleep but it was not very restful sleep. It made me feel out of control, detached from myself and although it stopped my shaking, it didn’t stop the cause so when they wore off, the shaking and fear returned with a vengeance. I found other ways to deal with the worry and shaking eventually (Motherwort and Oatstraw) but if I had not realized that these would help, I imagine I would still have been taking the drugs. That’s not a comforting thought as most people don’t know about those simple herbs. It was also a learning experience in that by simply removing the worry, I could remove the pain. 

We went on holiday  three weeks after the accident, to Bali, not exactly a hardship and certainly an opportunity for herbal learning. I learned all I could about Jamu – traditional Indonesian medicine. During my quest I met Lilir, a generous herbalist at Nadi Herbal in Ubud. A bug bite on my calf had grown to the size of a tennisball overnight and I needed local herb advice. Lilir calmly applied a hot herb tea compress, applied some herbal antiseptic spray, advised me that Patchouli essential oil is a useful first aid antiseptic in the tropics, and then taught me about Sambiloto. I began a course there and then. What an amazing herb! Sambiloto or King of Bitters (Andrographis paniculata) is a herb competing (and combining) with Sweet Annie from the Artemisia family in the fight against Malaria and Dengue Fever. Get to know it. It could really help you out. I used it to make me less appetizing to the bugs. It is really incredibly bitter so Lilir recommends it in pill form and not at a high dose. I began with one pill a day for 14 days and then down to two pills a week.

Kunjit asam Jamu

Another Jamu which I fell in love with is Kunyit Asam. I have learned how to make this at home and am trying to make a litre bottle of the orange wonder each week. It is a potent concoction of Turmeric, Tamarind, Galangal (or Ginger) and sweetened water. It has many useful properties and I treat it as a supplement to reduce inflammation and stimulate digestion. It is to be respected and should not be used by certain groups of people.  Interestingly, powdered versions are available in Balinese supermarkets and chemist shops. I bought a few packets but find them super sweet and poor immitations of the freshly made potion. But it is good to see that there is demand for such a mass produced Jamu product. An interesting read if you want to know more about Jamu was written quite recently by Susan-Jane Beers.

Since returning to Amsterdam I have found a great source of fresh Turmeric rhizome and have been experimenting with homemade Mead, infused with Turmeric, Ginger and Lemon. So far so good!

Jamu powder for sale in Bali

Whilst I was researching various nasties which can be transmitted via tropical insect bites, I learned about natural ways to treat Dengue Fever. Fresh Papaya leaf appears to be a very promising remedy. Here is some interesting reading about it. In learning about that, I found out about how fresh Papaya fruit can help keep various intestinal bugs at bay. So Papaya also became part of my daily regime.

Step Six – Break and Enter
VUAmsterdam
An operation was necessary in my case. It went very well and was less intrusive than it could have been but all operations are a shock to the system. Returning from the anesthetic was an unexpectedly “interesting” experience. Chanting a deeply ingrained Sanskrit  mantra from the Upanishads on and on and on, whilst drinking in delicious oxygen did the trick – after a while. Mantras are very powerful, whatever they are and wherever they are from. Choose a powerful one and a positive one and one for which you know the words well. It helped me to focus and to shut out worrying thoughts. It brought me back down to Earth and made me breathe slowly and steadily. Thank you Ranju for teaching it to me all those years ago!

Arnica gel was also a useful remedy at this stage. I rubbed a little on my temples to lessen the shock to the body. Here in Amsterdam I buy a homeopathic Arnica gel called Eerste Hulp Gel. It is a combination, containing also Calendula and I find it very useful for shock.

Moving on
So that’s my Wise Woman style summary of my recent healing experience. Now my biggest issue is recounting the events each time I meet friends for the the first time in a while. They want to know and I want to tell but looking back is not always beneficial. My new response is simply to be – I am healing well.

Now that’s a nice mantra!

Marlies’ Winter Wonder Honey

Ayurvedic winter remedy


Here at last is a quick recipe for Marlies van Wisselingh’s too simple to be true,  teacher’s throat saving, cold and fever beating Ayurveda remedy – passed to her from a very helpful Indian man some years ago, in India. Her husband Bob is a volunteer with the River of Herbs and has been enthusiastically telling us all about this mysterious potion for ages!

I’ll try to place more detailed instructions on here at some point but until then…

Into a sterile 250ml canning jar sterile (e.g. Fido, Blokker €3),  slice 2 organic lemons (peel and pips stay),  peel and slice a huge piece organic ginger (12cm?) into the pot and  add 2 teaspoons organic Turmeric powder. It is useful to alternate layers of lemon and ginger as you build up the contents of the jar. Then gently pour on runny honey. Use a chopstick to release air as you pour. Fill it to brim! Lid on. Refridgerate – leave to infuse for 3 months ideally, before sampling the concoction. Then due to the high water content (lemon and ginger juice) it is probably advisable to consume within a year. However, if you notice an unpleasant odour, bubbling (in a fizzy ferment type way), mould or anything else before that time then you should not consume it as a winter remedy. If mine begins to ferment I will gladly turn it into a bottle of mead.

This wierdly becomes a marmalade-y type concoction which appears to knock the socks off many brewing winter bugs. Have been using it on and off since September and am very impressed. Thank you Marlies!

Marlies takes it in a warm cup of water when needed. I have been using it straight from the pot, one teaspoon per dose.

Do let us know what you think of this simple Ayurvedic remedy.

Sweet Chestnut & Parsnip Risotto

Sweet Chestnut and Parsnip Risotto

I learned on Saturday, from one of my Willow apprenticeship group, that many Japanese cooks like to peel Sweet Chestnuts when raw and add them to rice whilst it cooks. So today I tried it out and wow – what a sensation this cooking combination can create! I intended to take a huge portion of this risotto into work for tomorrow’s lunch. Umm, there is now only about half a portion left so must think again about lunch. This risotto uses sweet parsnips, sweet chestnuts and rice which is naturally on the sweet side. The other ingredients are savoury and the result is sweet savoury. Never again will I cook sweet chestnuts without thinking of rice first. These sweet chestnuts came to me as a gift – foraged in the east of The Netherlands – unfortunately I have not found them of this quality in Amsterdam, though I’m sure they exist!

So here is my latest wildfood recipe for…

Sweet Chestnut and Parsnip Risotto

(makes about 2 main dish sized portions)

1 cup risotto rice – I used wholegrain (non risotto rice will do, it just won’t become so creamy)
1 small onion, finely chopped
Oil or butter
Parsley, sprig finely chopped
1 large parsnip, finely chopped
1/2 organic chicken or vegetable stock cube or 1/2 cup of good stock added in place of hot water
6 -8 fresh sweet chestnuts, shell and skin peeled, then the creamy nut broken into rough pieces.
Seaweed – I used 1 frond of Dulse or  equivalent, finely chopped.
A little Spinach, finely chopped (seasonally available local leaves would also have worked very well, e.g. Dandelion, Ground Elder)

Method

1. Gently fry the onion in a heavy based pan and when translucent add the dry, unwashed risotto rice.
2. Fry the rice in the onion, very gently, for a minute or so.
3. Add 1 cup of boiling hot water. Stir to prevent it sticking to base of pan and simmer steadily with the pan lid on.
4. Continue to stir breifly whenever you think about it.
5. Add the other ingredients to the pan and stir every now and again.
6. Add more hot water, cup at a time whenever you see the rice absorb the cooking water and the dish thickens up considerably.
7. Simmer and add water in this way until the rice is translucent and thoroughly cooked through.

Autumn Street Treats and Tricks

The past few weeks have seen a bounty of free street food falling from trees in Amsterdam. I’ve been enjoying Hazelnuts, Hawthorn berries & Sloes (plucked rather than fallen) and Sweet chestnuts – all absolutely delicious when prepared! The nuts and fruit are still there for the taking in many places but if you have trouble identifying these, keep your eyes open for fallen orange Gingko fruit, falling to the ground from mature female trees. See here how to harvest, prep and eat them and feel free to join me for a quick lunchtime forage in Oud Zuid, over the next couple of weeks.

image

Here above is Hawthorn (Crataegus monogyna) (NL: Eenstijlige meidoorn) in berry. This one is in a hedgerow of Frankendael park. I have mostly been cooking them like this:

hawthorn infused casserole

I infuse them into casseroles, using a stainless steel tea infuser. It gives a mild boost to the food and avoids me having to deal with the inedible pips. Ripe Haws taste a rather similar to bruised apples. Taste aside, they are reported to have many health benefits.

image

These are plump plum-like edible fruit which look similar to Sloes (which come from the well known Blackthorn tree (Prunus spinosa) (NL:Sleedoorn)). This shrub is growing in the hedgerow of a local playground and it looks more like a Bullace than a Blackthorn. The fruit are larger and the leaves larger and slightly more smooth. Whatever their exact identity, they are of the Prunus species and they tasted good when ripe.

Turkish Hazelnut Spiral
Turkish Hazelnuts (Corylus colurna) (NL: Boomhazelaar). Larger nuts than the usual multistemmed Hazel (and I haven’t had a blank yet, unlike with the others). I’ve been harvesting lots this year from Pythagorasstraat in Amsterdam Oost Watergraafsmeer. This tree species is used commonly as a street tree in cities, it is very tolerant of harsh growing conditions and doesn’t grow those multiple stems so can be kept easily under control in treepits.
Turkish Hazelnut Case

What a wonderful gift from the Amsterdam town planners!

drying washed Turkish hazelnuts

cracked Turkish Hazelnut

If you are lucky and find some on the ground either within or popped out from these extravagant nut cases, take them home and give them a good wash before drying the surface of the nuts and then get cracking! You can use them straight away as a snack, roast them (when the shell is off) or blend them to make a nut milk, pesto etc. How about mixing them with some cocoa or carob powder and honey to create some choc/carob nut spread? Yum!

And now for the deadly tricks…

bittersweet

These pretty tiny tomato like berries are the fruits of poisonous Bittersweet (Solanum dulcamara) (NL: Bitterzoet). Please note that in the US there is another plant called Bittersweet which is quite unrelated. The one in my photograph here above is a member of the Nightshade family and I wasn’t able to get a decent shot of the leaves but they resemble a potato leaf rather than the long blade seen next to the berries (see the link for a clearer idea and better still, look in a good field guide!)

Yew berries
A female Yew tree (Taxus baccata) NL: Venijnboom, laden with beautiful red fruit. The soft slimey flesh is actually edible BUT the seed within each red fruit is deadly poisonous.

Fly agaric Frankendael Park Amsterdam

Another red and poisonous autumn beauty, Fly agaric toadstool (Amanita muscaria) (NL: Vleigenzwam). It is also psychoactive. These two were growing in Park Frankendael last week. There seem to been quite a flush of them across northern Europe recently.