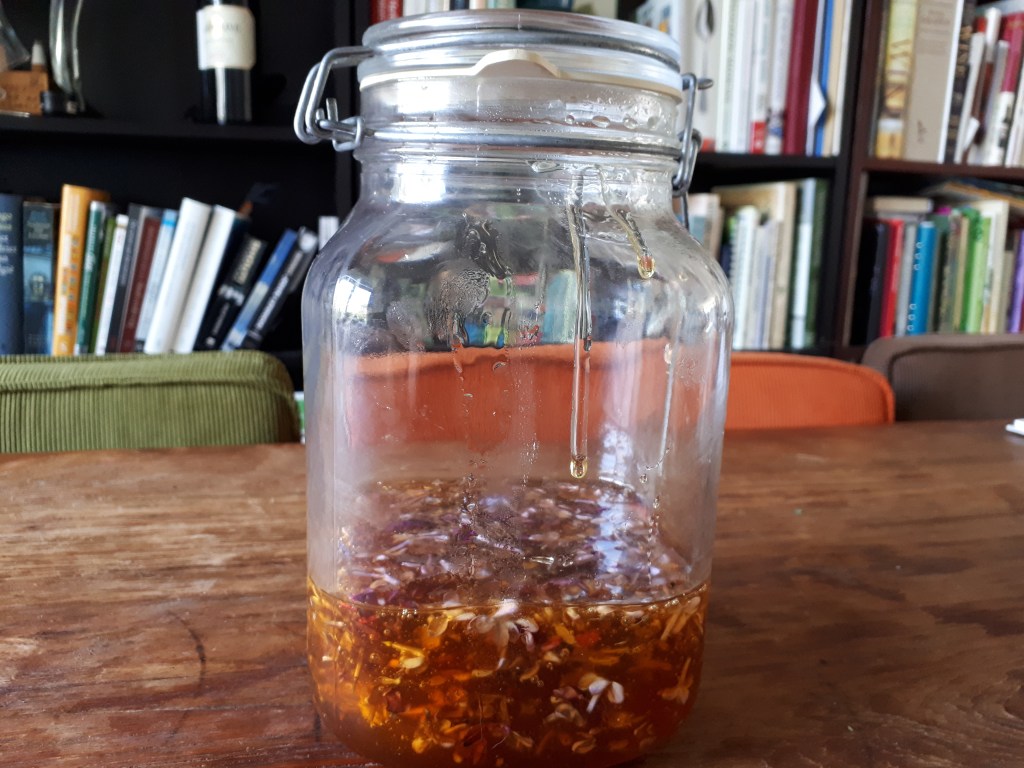
Perhaps you would like to try this recipe. It’s really simple and needs only three ingredients: honey, apple cider vinegar and hawthorn berries (haws).
Gather a handful of ripe haws (be sure you gather the correct herb), check them for bugs and damage before washing then clean. Dry off on a cloth. Select the best haws, when surface dry, and add to a small, clean and dry glass jar. Now smother them in honey. Poke gently with a chopstick to help the honey spread between the haws. Add more honey, ensuring the jar is two-thirds full with berries and honey. Now fill the rest of the space in the jar with vinegar. Poke around some more, with the chopstick, to help the honey and vinegar to mix. Seal the jar, label, and store in a cool dark place for several weeks. Then strain and bottle the resulting Hawthorn oxymel.
This oxymel can be diluted with water to make a refreshing drink, or taken by the spoonful to help soothe sore throats.
Just felt like posting a few photos today, of herbs grown, found or harvested recently. Also to mention that I now have more availabilty to run workshops and walks, so have set some new apprenticeship dates for September – October and will soon be setting some Amsterdam herb walk dates.
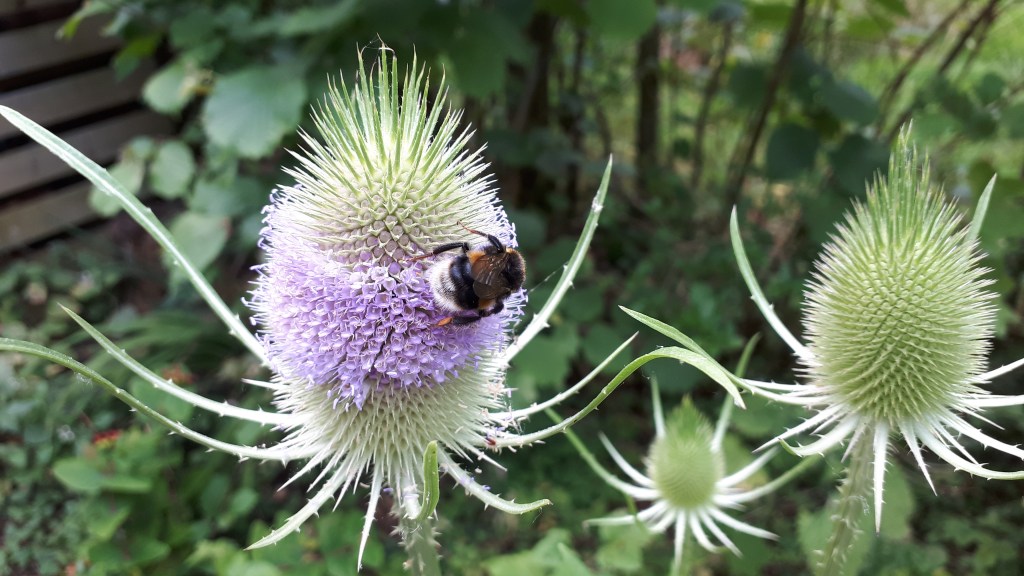
Bumble bee on teasle flowerhead
This summer, I have been spending lots of time at my volkstuin. Teasle (Dipsacus fulonum) is a tall wild flower, not best known in gardens because it tends to do its own thing, growing exactly where it likes, often at the edge of where humans would like to walk, and as the plants develop the often lollop over paths and catch on humans clothes. Clearly, this is not always desired (although this makes/made teasleheads perfect for carding wool – the Dutch name for the plant is Kaardebol – literally carding ball). Anyway, I love teasles and tend to encourage visitors to work around them and admire them in my garden, rather than pulling them up. They don’t transplant so well for me. People transplant with far more ease.
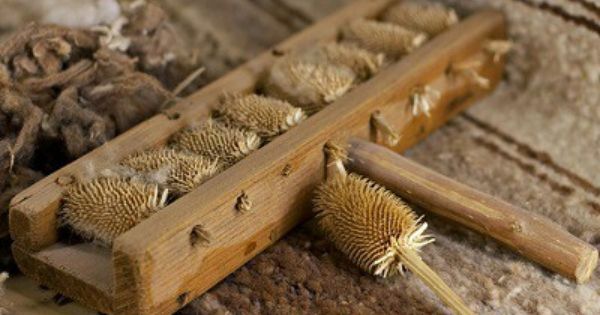
Dried teasleheads in a carder. Photocredit: Pinterest
I love watching these plants develop through the year, from their characteristic sturdy seedlings in spring to tall summer beauties. They always get me excited – in a herbalist kind of way. How tall will they grow? How many flowerheads will each plan bear? Will they make it through possible summer storms? Will I tincture the root of a two year old this autumn? How many bumblebee species will visit them this year? Is there a way to encourage more flowerheads on one plant? and so on..
Last week, each morning that I woke at the gardenhouse, I pulled back the curtain and lay in bed admiring the bumblebees as they worked the teasle flowerheads. As you can see here, the flowerheads are made up of tiny pale purple flowers, apparently around 2000 per flowerhead, arranged in a phenomenally pleasing arrangement which seems to me to match the Fibonacci series. They open in sequence, as a ring, starting low on the flowerhead and day by day this ring to move up the flowerhead. Sometimes several rings are progressively ripening, moving up the flowerheads. The cause of this is progressive maturation of the tiny flowers, from the base to the top of the flowerhead. I looked up how this happens. For those of you interested in this, here’s an interesting research paper about the patterns of development in teasle flowers.
The bumblebees are essential to the process of pollinating those tiny flowers. They busy about, over the purple rings, from about 8am, each day that there is sun. As they wander around the flowers, burrowing in for nectar, they also kick off the dead flowers of the day before. They do literally seem to kick them off. If you manage to watch a teasle being “worked” one morning, you may be lucky enough to see the tiny purple flowers falling to the ground, as a bumblebee wanders around the flowerhead either biting or kicking them off. This appears to be pure symbiosis and is a great pleasure to observe. It puts the day to come in perspective and I recommend it!
Meadowsweet – Filipendula ulmaria
Next is Meadowsweet. I adore this herb. She is the absolute Queen of the Meadow in my eyes. She smells sweet and dreamy, is as tall as many teasle plants, is slender, takes away pain, eases the stomach and aches and pains of joints. She is oh so light and yet strong, effective and intoxicating. I make my mead when Meadowsweet is in bloom. I see these flowers as an essential ingredient in any mead. Perhaps that’s just me. This year, the fruits of my previous Meadowsweet planting labors have been rewarded as I now have several garden areas where the meadowsweet is flourishing. Meadowsweet is also beloved of bees, hoverflies and many other insects. The OBOD Seedgroup which I run, is also called Meadowsweet. We met amongst the flowers this weekend, to celebrate Lughnasadh, Druid-style.
Potentilla indica. Photo credit: Livvy de Graaf
These beautiful berries are growing throughout the beds at my volkstuin. They have almost no flavour and belong to the wild flower Potentilla indica (Schijnaardbei). It creeps between other plants, has trifoliate leaves and small 5-petalled yellow flowers, At this time of year, they may develop into bright red achenes which are fruit, covered with tiny seeds. The leaves, flowers and fruit of this plant are edible. The leaves are quite medicinal and can be added in small quantities to soups but in my opinion the best way to eat this plant, is to preserve the ripe fruits in local honey or in a Rumtopf.
From September this year, I will be working only three days a week at school so will have far more time for running herbal workshops and walks. Many dates are already booked up, but if you are keen to book a walk during the autumn or winter, let me know and I hope that we can organise a green exploration together. I also offer private consultations. Please see my events page, or join Meetup.com for Urban Herbology happenings. Apprenticeship meetings are already listed there until end October. Meadowsweet OBOD Seedgroup gatherings are not listed there. Please contact meadowsweet.amsterdam@gmail.com, if you would like to be informed of open gatherings, for those interested in nature-based spirituality, and the closed gatherings which are only for OBOD members.
For English click here Excuses, ik heb je enigszins misleid. Dit bericht gaat eigenlijk over het maken van Lilac Mead en Lilac Honey, in plaats van Lilac Wine.
De reden voor mijn bedrog is dat ik elke keer dat ik langs een lila boom kom, denk aan mijn moeder, onze oude tuin, haar beste vriendin Francis en Jeff Buckley. En lieve Jeff Buckley zong adembenemend goed Lilac Wine, dus als ik over Sering schrijf, kan ik dat alleen maar bedenken en vandaar de misleidende titel.
Het horen van het lied brengt me terug naar een tijd dat ik de hele dag naar hem zou luisteren en elke pauze zou vasthouden. Als je ook een beetje romantisch bent, raad ik aan om de track te spelen terwijl je mijn instructies voor het maken van mede leest. Ik kan niet goed ademen terwijl ik naar Mr Buckley luister (ik schijn met hem mee te ademen) dus vergeef me alsjeblieft als ik zo nu en dan mijn draad verlies …
Laten we eerst wat lila honing opzetten
Ja, de bloemen van de Sering struik (Syringa vulgaris) zijn eetbaar. Deze plant komt uit de Olijffamilie (Oleaceae) en je merkt misschien dat de bloemen lijken op die van Liguster (Ligustrum vulgare).
Sering is gemakkelijk te herkennen aan de grote trossen van vierbladige bloemen, elk met een kleine buis, die het verbindt met de bloemclusterstelen en de nectar bevat. Sering bloemtrossen hebben een sterke geur en zijn over het algemeen ongeveer 15-20 cm lang. Volwassen Sering bladeren zijn hartvormig en ongeveer 10 cm lang, terwijl Liguster kleinere bladeren heeft, een kleinere gestalte in het algemeen en veel kleinere witte bloemtrossen.
Liguster wordt vaak wild gevonden en wordt geplant om een dichte haag te maken. Sering wordt soms buiten tuinen gevonden, maar wordt vooral gekweekt vanwege de ongelooflijke bloemen en de aantrekkelijke dikke stelen. Ik klauterde altijd rond en picknickte met slakken in onze oude Lila struik, als kind.
Syringa vulgaris
Ja, alle kleuren van Sering bloemen werken hiervoor. De geur is het belangrijkste eigenschap, een beetje kleur is een bonus. Het is het beste om de witte, lila of paarse bloemen te oogsten terwijl ze in topconditie zijn, maar zoals je kunt zien op de afbeeldingen hieronder, gingen sommige van de bloemen die ik vandaag heb geplukt gedeeltelijk over. Maakt niet uit – het is gemakkelijk om de beste onderdelen van de rest te scheiden.
Ik weet niet hoe het met jou zit, maar mijn materialen voor het maken van mede zijn momenteel niet steriel en mijn beperkte kastruimte in het appartement zit boordevol ingeblikt voedsel en gedroogde bonen. Dus terwijl de lila bloemen een week of twee in honing trekken, kan ik een kleine gistingsfles en waterslot vinden en steriliseren en ruimte maken om de fermenterende mede te bewaren. Ik woon in een appartement in Amsterdam, dus er is weinig ruimte en ik brouw in kleine hoeveelheden.
Oogst voorzichtig en legaal 1 of 2 volle sering bloemhoofdjes. Met legaal bedoel ik, gebruik een schaar of snoeischaar en vraag toestemming. Neem maar een beetje. De drie koppen die ik vandaag heb geoogst waren van drie zeer grote sering struiken.
Leg de bloemen, bij voorkeur op een lichtgekleurd oppervlak, tien minuten uit om eventuele insecten aan een plakkerige dood te laten ontsnappen. Scheid vervolgens alle dode of onbetrouwbaar ogende bloemen van de trossen.
De paarse bloemen ruiken nog steeds geweldig, maar sommige bloemen in de tros zijn voorbij hun beste
Kies elke kleine bloem uit de trosstelen. Zorg ervoor dat je de nectary niet op de stelen laat staan, die moet in de honing gaan. De nectary bevindt zich aan het begin van de bloembuis, net waar deze het groen raakt. Knabbelen en je proeft de zoetheid op dat punt van de tube.
De geur die vrijkomt tijdens deze verwerkingsfase is geweldig – als je van de geur van sering houdt.
Plaats de afzonderlijk geplukte bloemen in een schone glazen weckpot of jampot. Ik heb vandaag een pot van 2 liter gebruikt en je kunt zien dat er nog veel ruimte over is, wat handig zal zijn als ik over een week of zo water toevoeg.
5. Giet nu voorzichtig ongeveer 500 ml / 2 kopjes vloeibare honing (bij voorkeur lokale honing) over de kleine bloemen en zorg ervoor dat ze volledig bedekt zijn. Zachtjes maar grondig zachtjes om ze in de honing gedrenkt te krijgen. Je hebt zoveel mogelijk contact nodig tussen de honing en de bloemen.
6. Gebruik een schoon, slank, puntig voorwerp, zoals een stok of breinaald, om rond te prikken en eventuele opgesloten luchtbellen uit de mix te verwijderen.
De bloemen zullen naar de top van de honing stijgen als er luchtbellen ontsnappen. Dat is prima. Zorg er gewoon voor dat die bloemen in honing zwemmen en dat je controleert of alle luchtbellen zijn ontsnapt.
Bloemen stijgen op met de kleine luchtbelletjes
Laat het mengsel intrekken zolang je het kunt verdragen om te wachten. Het basisproces duurt niet lang (een dag), maar naarmate je langer wacht met deze stap, krijg je een veel interessantere mede. Ik vind dat een paar weken voldoende is om een aangename complexiteit van smaak te ontwikkelen in de honinginfusie. Houd gedurende deze tijd, indien mogelijk, dagelijks de infuserende honing in de gaten. Controleer of de bloemen helemaal met honing doordrenkt zijn, vooral tijdens de eerste dagen, anders kun je bruin wordende bloemen vinden – een zeker teken dat zuurstof de bloemen bereikt en rotten mogelijk maakt. Sommige mensen houden ervan om de verzegelde pot een week lang elke dag ondersteboven te houden om het probleem te voorkomen. Ik ben er meer ontspannen over, maar ik zorg er dubbel voor dat er de eerste paar dagen geen lucht in het mengsel achterblijft en dat de bloemen doordrenkt zijn met honing.
NB: Als je alleen de geïnfuseerde honing wilt, zeef dan de bloemen van de honing op dit punt in het proces. Giet het mengsel door een kaasdoek / mousseline. Bewaar de doordrenkte honing in een schone pot en gebruik de gebruikte bloemen in desserts of voeg een theelepel toe per kopje gekookt water voor thee. Anders composteer je ze. Ik bewaar graag wat doordrenkte honing en gebruik de rest voor het volgende mede-recept.
Nu voor het gist!
Voeg na voldoende infusietijd gekookt en vervolgens afgekoeld (tot kamertemperatuur) water toe aan de honingbloemeninfusie. Verschillende culturen staan bekend om het maken van mede van verschillende honing: waterverhoudingen. Hoe hoger de honingconcentratie, hoe hoger het uiteindelijke alcoholgehalte. Ik heb liever een milde mede
Voor deze voeg ik 3x het volume honing toe, in water. Omdat ik ongeveer 500 ml honing heb gebruikt, zal ik ongeveer 1500 ml water toevoegen. Dat zou de pot vullen, dus ik zal er waarschijnlijk iets minder aan toevoegen. Mogelijk hebt u op dit punt een grotere weckpot nodig. Ik hou van de 2-liter exemplaren, omdat ze een behoorlijke hoeveelheid brouwsel kunnen zetten zonder al te veel opslagruimte in beslag te nemen.
Roer nu alles goed door en blaas lucht en natuurlijke gisten de jonge mede in. Gebruik hiervoor een schone lepel. Er zullen natuurlijke gisten zijn over je Sering bloemen, maar deze stap moedigt meer aan en het stimuleert een beter brouwsel.
Bedek de pot met een doek, bijvoorbeeld een schone mousseline en houd deze op zijn plaats met een elastische band rond de rand van de container. Dek het deksel niet volledig af. Het idee is om te voorkomen dat vliegen binnendringen en gisten in de lucht bij het brouwsel te laten komen.
Wacht een week of twee en houd het in de gaten voor microbiële actie. Schuimvorming is hier een goede zaak. Het geeft aan dat gisten in opkomst zijn en de geïnfuseerde honing beginnen te fermenteren, waarbij alcohol en kooldioxide worden geproduceerd. Roer het elke dag goed door, minstens één keer per dag om meer gisten in te rijden. Mede heeft gist nodig!
NB: Als de lokale moerasspirea rond deze tijd in bloei komt, voeg ik een bloemhoofdje van twee toe aan de mix. Moerasspirea bloemen zijn bedekt met lokale gisten en helpen echt bij het fermentatieproces.
Witte schuimende moerasspirea bloemen, van de kruiden van een vorige brouwsel
Gedroogde moerasspirea zal het doen, maar ik hoop dat je het ermee eens bent, het is veel minder Jeff Buckley dan ronddwalen naar een lokale beekrand en een sterk geurende bloei plukken die bekend is bij de druïden en sluwe mensen van weleer en bij sommigen nog steeds bekend om hun plaats in bruidsboeketten en midzomerkronen. Verder gaan…
Ga door met stap 10 totdat u tevreden bent dat er een goede hoeveelheid actie in uw mengsel zit. Als je helemaal geen schuim hebt, bovenop de vloeistof, heb je niet veel gist en krijg je niet veel van een mede. Geef het dus meer tijd.
Als er genoeg opwinding is in uw met stof bedekte weckpot, haalt u de bloemen eraf (en composteert u ze alstublieft). De vloeistof is je onvolgroeide mede. Behandel het vriendelijk. Het heeft nu een gistingsfles nodig met een luchtslot en dat moet een mooi geschrobde en steriele gistingsfles zijn.
Ik gebruik gistingsflessen met een inhoud van 2 liter van de Brouwnarkt.nl. Ze zijn geweldig voor mijn behoeften omdat ze klein genoeg zijn voor mijn appartement en het groen getinte glas voorkomt dat het meeste zonlicht binnenkomt en mijn gisting doodt. Hierdoor kan ik ze op hun beurt uit de kostbare kastruimte houden en op een plank waar ik ze kan volgen (ook bekend als ze elke keer als ik langskom en Lilac wijn voor mezelf zing).
Pas de luchtslot aan zodra de onvolgroeide mede in de gistingsfles zit. Deze moeten meestal voor de helft met water worden gevuld. De rol van de luchtslot is om frisse lucht en insecten buiten de fermentatie te houden en tegelijkertijd bellen van CO2 te laten ontsnappen.
Laat het zo zitten, zonder ermee te roeren of ermee te rommelen, tot het een heldere week niet meer borrelt. Dit kan een paar weken zijn, het kan een paar maanden zijn. Wees geduldig. Goede dingen komen aan degenen die wachten.
Een lange periode van niet-borrelen geeft aan dat de fermentatie is gestopt. Dit kan echter tijdelijk zijn, bijvoorbeeld bij lage temperaturen. Pas dus op dat je niet te opgewonden raakt en te vroeg flesjes maakt, want je zult merken dat hogere temperaturen later in het jaar ervoor zorgen dat het proces opnieuw start. Als dat in uw afgedekte flessen gebeurt, krijgt u waarschijnlijk een puinhoop van lekkende mede en mogelijk enkele exploderende flessen.
Ik heb de neiging om de luchtslot op mijn voltooide mede maandenlang te laten staan. Zolang het luchtslot voor de helft gevuld is met water, kan er niet veel misgaan. Hierdoor kan de mede rijpen.
Ten slotte wordt het afgewerkte deel in flessen gesifoneerd, zoals een sterke glazen Grolsch-fles met drukdop. Hiervoor bewaar ik een meter schone aquariumslang.
zijn ene smaakte erg goed – zelfs na 7 jaar wachten. Elke fles is een verrassing!
Drink onmiddellijk of bewaar om de mede te laten rijpen.
Ik denk dat mede geweldige dingen zijn en ik hoop dat jij het ook leuk vindt. Laat me weten hoe je verder gaat met het recept als je het probeert. En als je van de lila tonen van meneer Buckley houdt, luister dan opnieuw. Misschien is er een lied dat Lilac mede heet? Laat het me weten!
Ik bied een kruidencursus voor diegenen die geïnteresseerd zijn in het gebruik van lokale kruiden en in harmonie met de natuur leven, terwijl ze in de stad zijn. Voor meer informatie, stuur een e-mail of bekijk de informatie hier. De cursus wordt online gehouden met wekelijkse zoombijeenkomsten, 1:1 wandelingen en workshops die opnieuw starten wanneer de corona situatie verbetert. De cursus is beschikbaar in het Nederlands en Engels.
I haven’t posted anything for a while although have been out in the plants a surprising amount, especially considering I’m now classroom bound five days a week. Yesterday was midsummer so I held a small gathering in Park Frankendael. I felt so honoured to be surrounded by such lovely people and freely the urge to share a free photos and words about it.
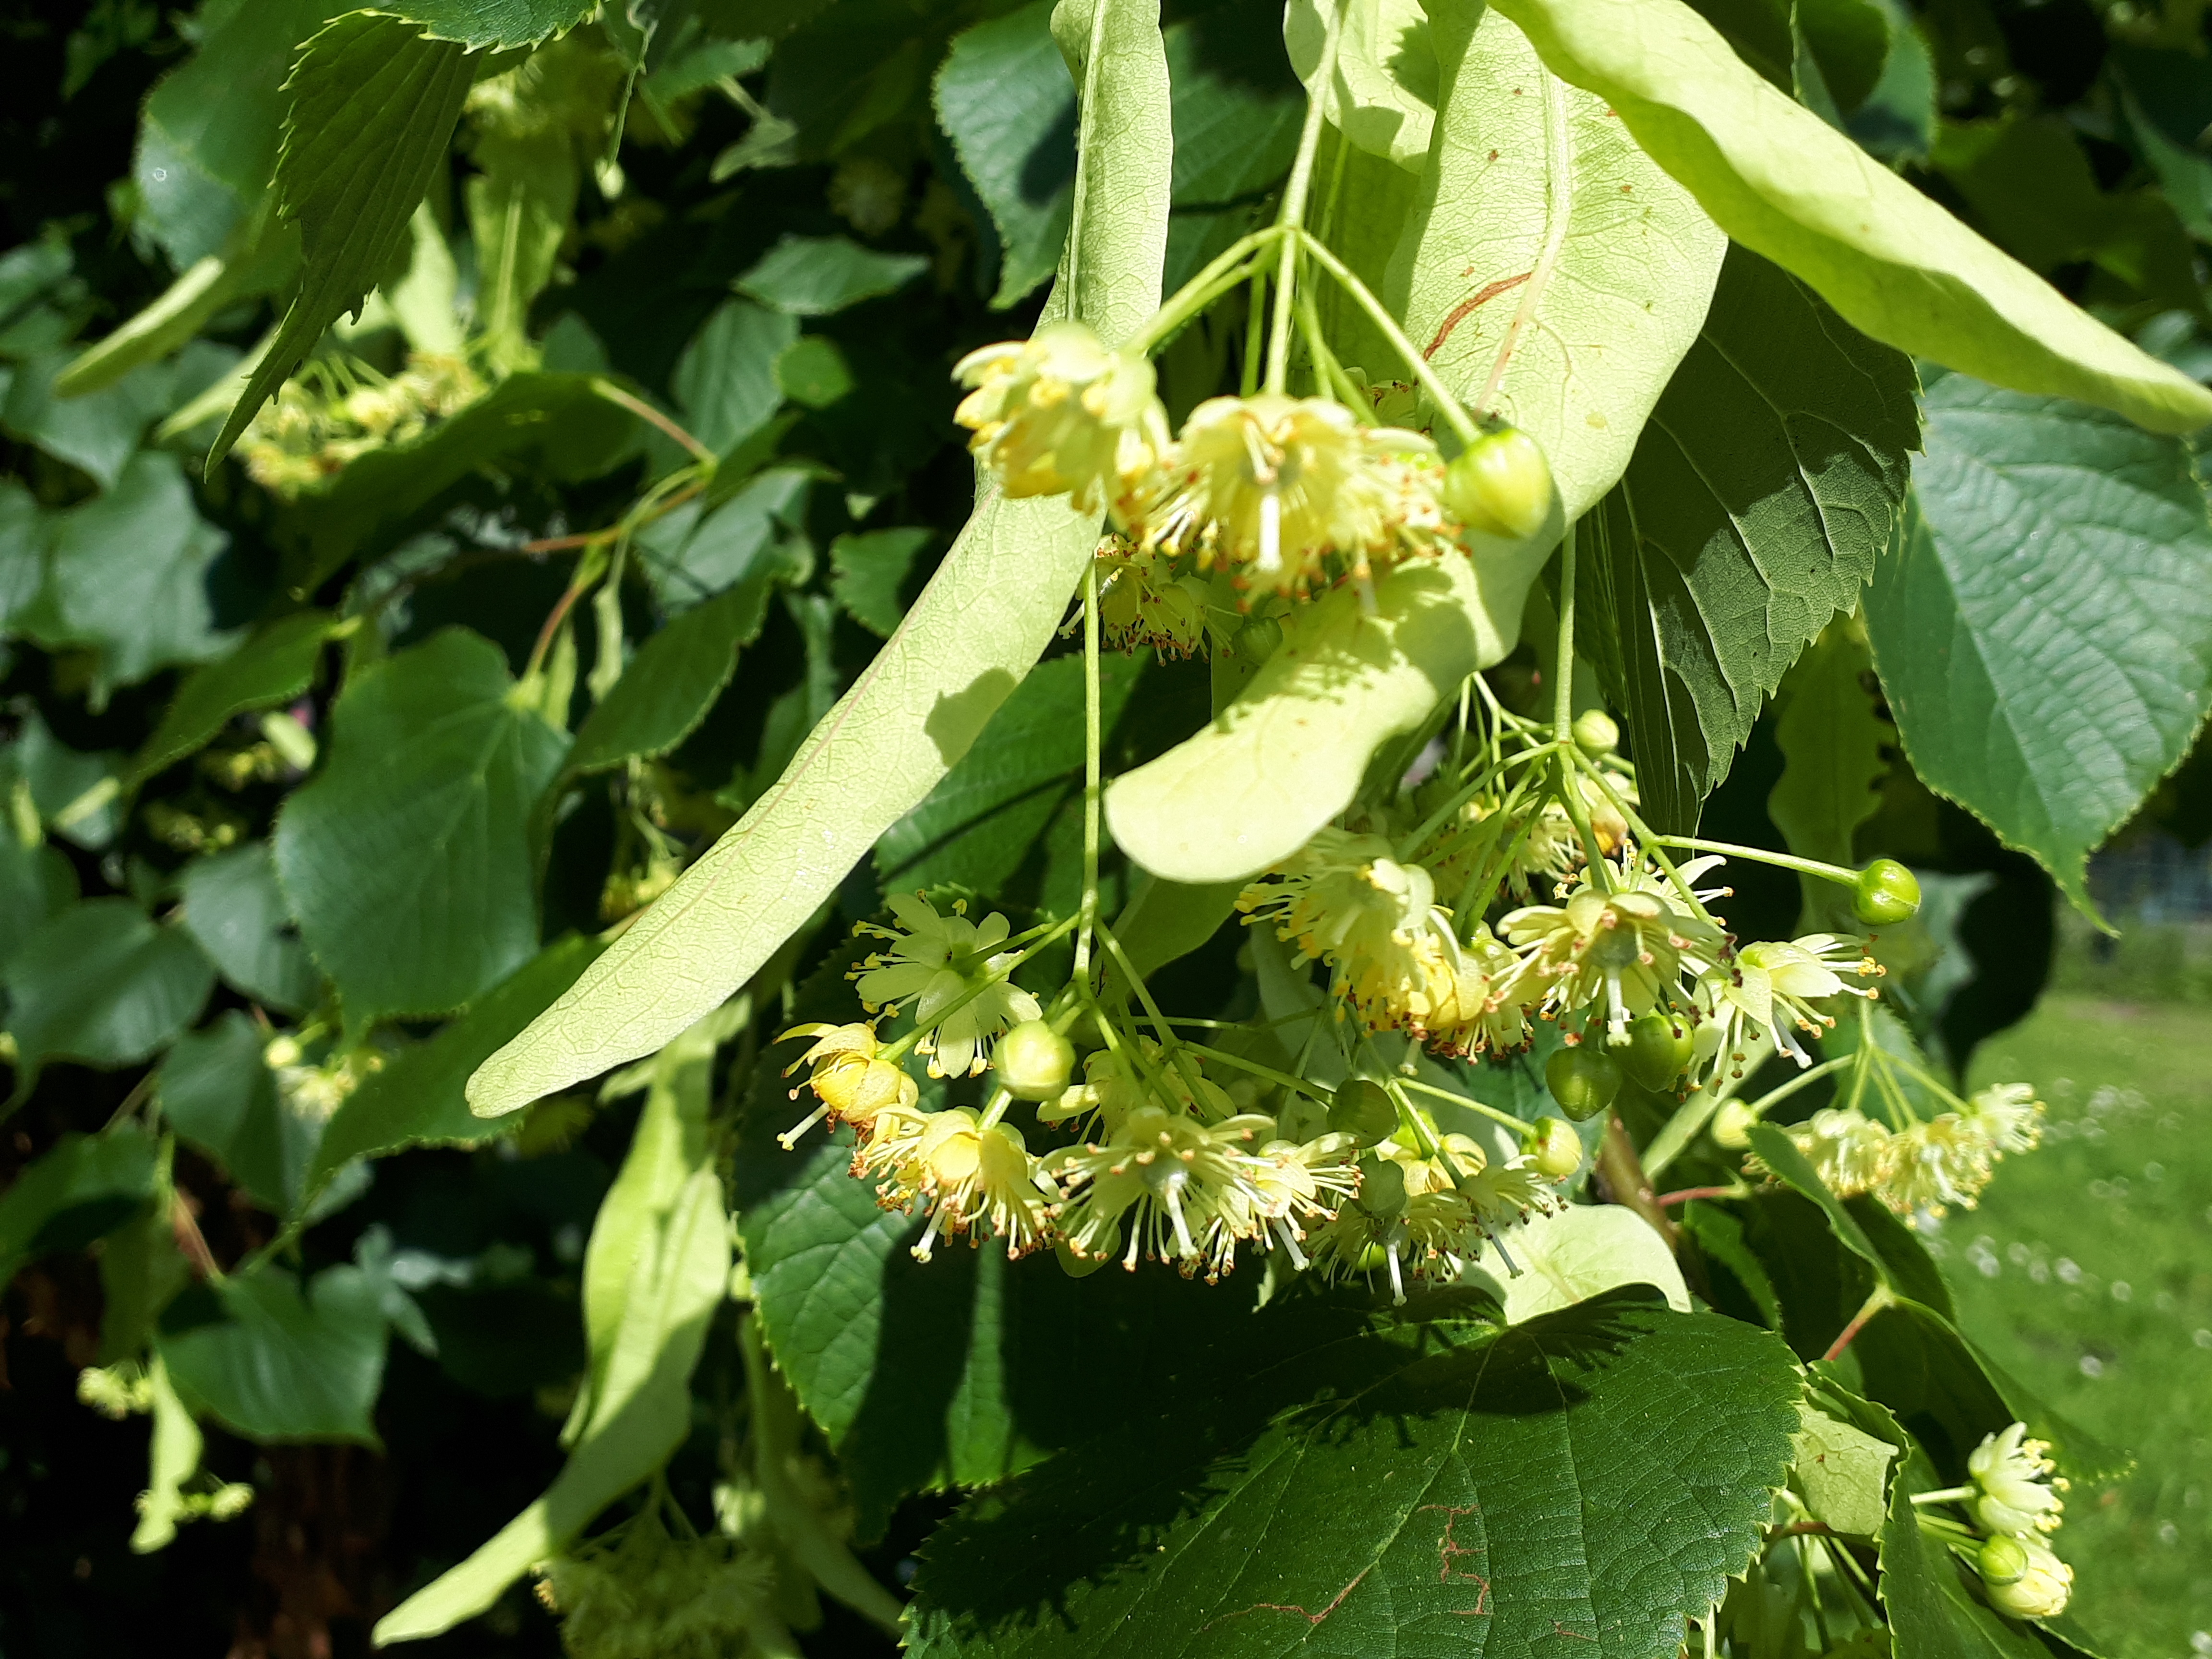
We gathered early, soon after 5pm under the grandest Lime trees in the park. I laid down an old, well loved and patched gold-threaded Indian quilt on the grass and we spread out the food. By Lime trees, I mean Tilia, linden. Amazing trees, here’s a post I wrote 8 years ago about them if you’d like to explore some of their numerous gifts and folklore.
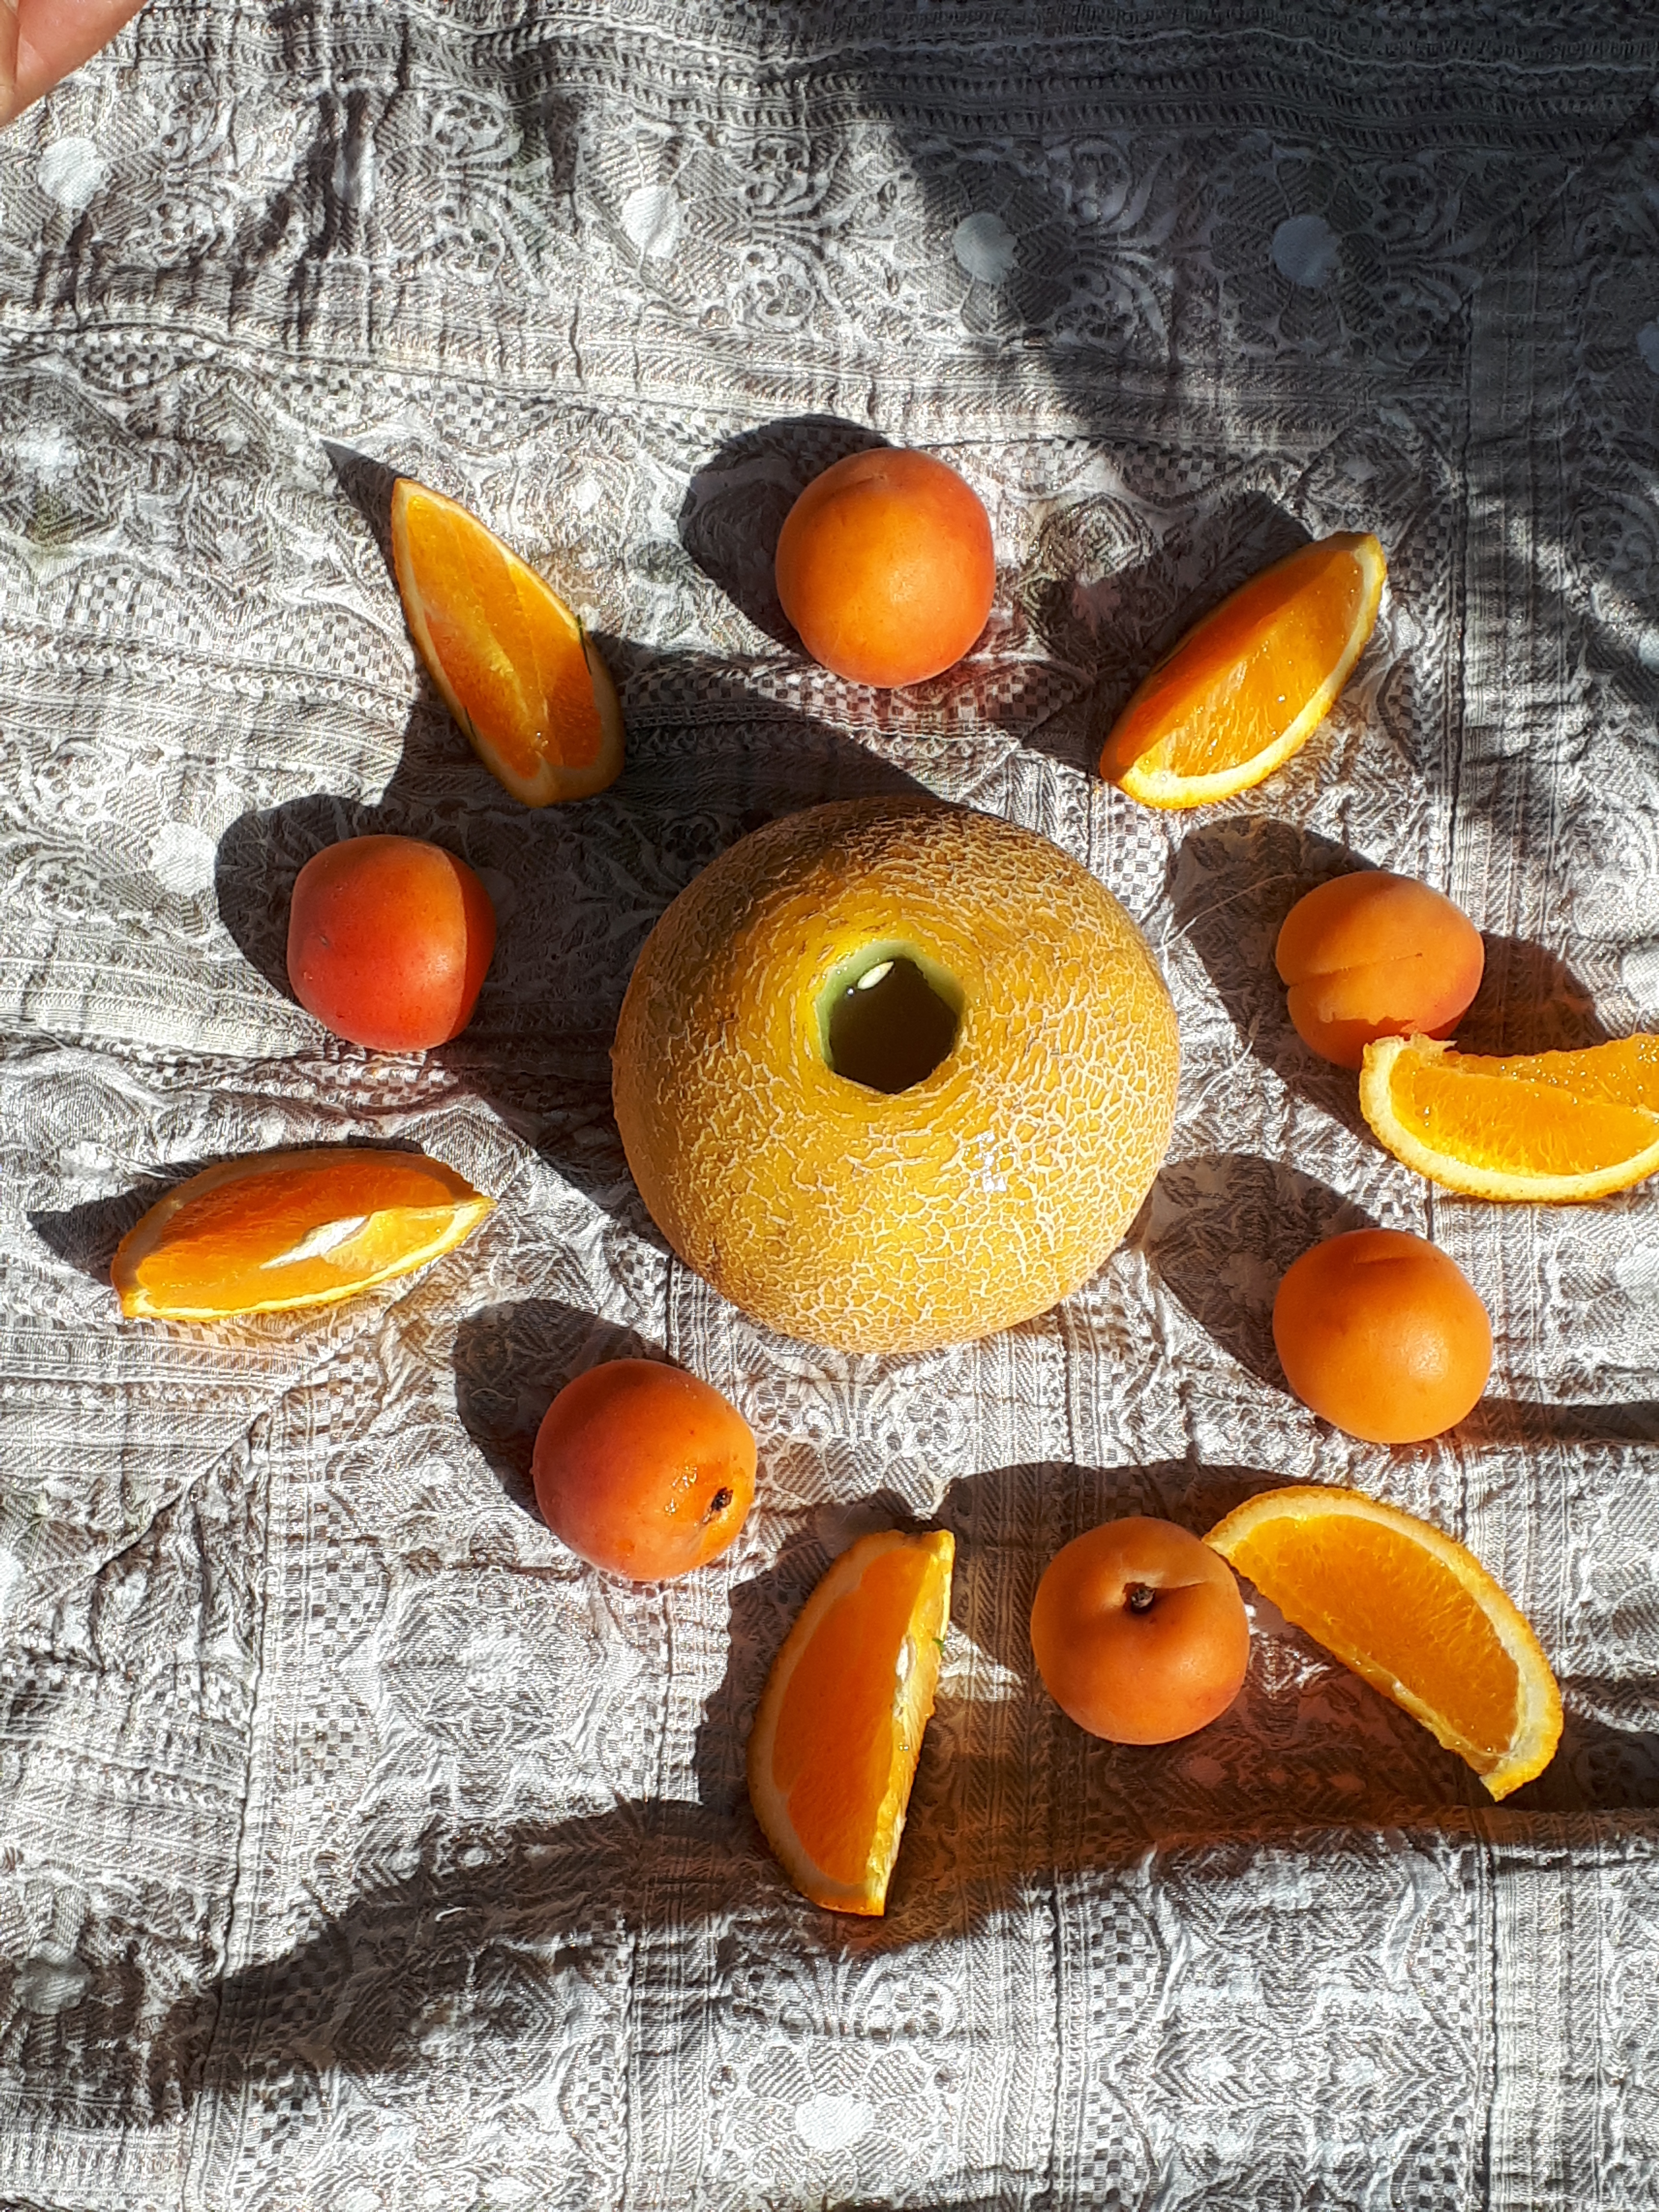
Sameena came prepared as ever for some ceremony. This time with a sweet ripe melon, orange and apricots. She scooped out enough of the melon and Livvy poured in sunshine coloured fruit juice. This sat in the centre of the quilt, we sat circled around it age then Sameena added a slice of dripping orange and an apricot for each of the group.
We joined hands and shared thoughts about the sun at midsummer. One by one the group swelled in number so extra slices of orange and more sharing of thoughts.
After, we supped from the melon bowl and ate the orange and other foods. Such a simple, homespun and effective ceremony.
I’m dramatically reducing my stocks of herbal concoctions at home right down; pairing it right down to nothing more than I need for one season. My library is also being shared so more people can benefit from it and my energy has more space to expand – More on that from this lovely new post by apprentice and illustrator Hannah McDonald.
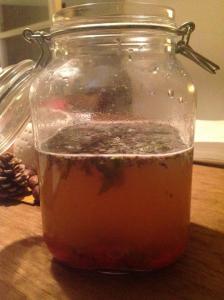
I’ve been holding onto some magical homemade mead for quite a long time so last night was the perfect opportunity to crack them open and enjoy. I believe that there’s little happier in the glass kingdom than a bottle of home crafted ferment, being steadily shared between freinds. First to be sampled was a very low alcohol but high energy Elderflower mead. The colour was just right for the bright early evening sun. Later, as the strength of the sun waned, a deep red heady and potent concoction was downed, sip by sip.
Photo credit: Sameena. Midsummer 2019 – Livvy, roly-polys and daisies.
After some wonderful tree song singing courtesy of Grace, lime leaf munching, pistache shell ephemeral creating, catching up on thoughts, roly-polys and eating, we packed up camp and took a stroll through the River of Herbs orchards, just in time for the sun to set over the Limes. How wonderful the herb gardens look too! Full of frogs, scents, flowers and energy. The River of Herbs Monday morning team are doing such an amazing job of caring for them. More help is always welcome to get in touch if you’d like to be involved. I look forward to joining them more during my summer holiday.
We explored the newly crafted fairy homes, harvested a little Motherwort and Bay and observed the Lotus blossoms in the small pond, close up over the time that we were there.
All in all, a beautiful evening with beautiful souls. We’re hoping to meet again for Lughnasa. If you’d like to join, keep an eye on the Meetup group or get on touch.
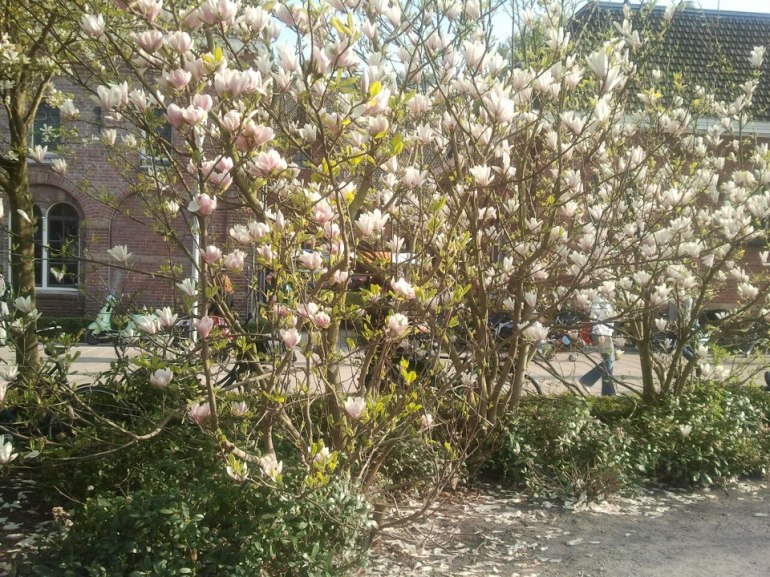
Magnolia is a tree which I fall in love with again, every year. Everything about it enthralls me. From the graceful angles of the branches, the bark, exotic blooms to the glossy evergreen leaves. A huge magnolia in bloom is a show stopper. One such tree arches quietly over the terrace behind Huize Frankendael, in Amsterdam east. Hundreds of visitors must walk beneath it without giving the tree much thought, until in March or April it explodes into bloom. There is no other tree that I would rather sit beneath and gaze up through than that magnificent magnolia in spring!
Edible and Medicinal Magnolia Petals The flowers of Magnolia trees are edible and medicinal. In traditional chinese medicine, Magnolia flowers are known as Xin yi hua and are associated with the lung and stomach meridians. I enjoy eating them fresh plucked each year and happily report that they taste fragrant and spicy. I can also report that when I eat Magnolia petal, my sinuses become clear, quite like magic.
Imagine a slightly rubbery super sized rose petal which clears the sinuses a little, when you bite into it and you are getting close to the mouth feel and flavour of a magnolia petal. I like them very much and because a little goes a long way with these large petals, I can certainly recommend them to other urban herb lovers. As you may know, via my apprenticeship and walks, I teach how to harvest interesting herbs in towns and cities, in a safe and ethical way. This entails taking only a little, leaving no trace and really make the most of the harvest. Do contact me if you would like to know more – This is my passion!
Medicinal Bark Fairly recent research suggests that Magnolia bark extract can help with oral health, stress reduction and several other disorders. In traditional medicine it is reportedly used as an antibacterial, anti-inflammatory, anticancer agent, in the treatment of Alzheimer disease, depression, diabetes, and menopause. All Magnolia species varieties are considered to possess the same medicinal qualities and there are apparently no known side effects – although we know that someone somewhere, could be allergic to the plant, so please be cautious. Magnolia Bark Extract is widely available for sale and Magnolia bark is an ingredient in many traditional Chinese medicines including Hsiao-cheng-chi-tang, Wuu-Ji-San, Heii-san, Shimpi-to, Hangekouboku-to, Masinin-gan, Sai-boku-to, Syosaiko-to, Irei-to and Goshaku-san.
Japanese traditional medicine also prizes both the bark and flowers of Magnolia. Bark harvesting is not something suggested for the urban forager because it certainly leaves a trace and it is certainly not ethical.
Magnolias in Westerpark
Stealthy Petal Plucking When harvesting from perhaps the most beautiful of city trees, one would perhaps look both foolish and anti-social to pluck entire flowers. So I suggest that you don’t. Instead, I recommend that when stumbling upon a prime Magnolia specimen in bloom, and feeling the urge to eat it, you do the following:
1. After checking for unwanted observers, wander nonchalantly up to the tree. Are the blossoms within your reach? If not move on to another. 2. If so, reach up as if to smell the fragrance of a prime bloom, pull it gently to your nose with one hand, whilst deftly plucking a single petal from its base, with the other hand whilst simultaneously inhaling the spicy aroma. 3. Tuck the plucked petal in your pocket as you gently release the bloom with your other hand. 4. Move along to another flower, as if to compare its scent with the previous bloom. Repeat steps 1 to 3 until you have harvested three or four petals.
A magnolia flower can miss one petal without much issue. If two or more petals are plucked from one bloom, evidence of foraging shows and that is not the plan. So one petal from a flower, move to another, one more petal and so on. When you have three or four petals, you are done. That is enough to make something very tasty and useful and you will have increased your stealth foraging skills..
Untouched – Delicious
Favourite Trees I tend to forage a handful of petals each year, from 6 favourite Magnolias which are dotted around east Amsterdam. They are all growing in public spaces so stealth foraging is required. I don’t harvest from them if other people are around because apart from it just looks silly. I also limit myself to plucking a petal from two flowers per tree. I first wrote about my love of Magnolia petals on 2012. Since then urban foraging has increased in popularity so I also am careful to only pluck from Magnolias which seem not to have been visited by other foragers.
Magnolia Petal Recipes Things that I like to do with a precious handful of magnolia petals. I hope that you have a go and let me know how you get on in the comments.
Magnolia Petal Pickle They can be pickled, old English style by simply filling a small jar with fresh petals and then completely filling the jar again with rice wine vinegar or apple cider vinegar with a little salt and sugar to balance the flavours. I don’t add sugar or salt so I guess my version is simply Magnolia petal vinegar – I don’t mind because it tastes good 🙂
Fermented Magnolia Petals You may like to ferment them using a little salt and water, in the style of Sandor Katz. I prefer to lay them in my handy small Japanese vegetable press. I then sprinkle with a pinch of salt and apply the gentle but consistent pressure of the Japanese press for about 3 hours. This produces a very light ferment and it draws out some of the water from the petals (which tastes good too). You can leave the pressure for a lot longer if you prefer, winding the contraption every few hours to ensure the petals are in fact under a little pressure and to encourage the process.
Magnolia Petal Honey When I first tasted a Magnolia petal and felt its clearing effect on my sinuses, I decided to transfer the petals’ properties to honey. This is soooo simple to make. It creates something which my family and friends find delicious and I hope you will too. If the honey turns you off, try Agave syrup. It works very well but in my experience is less spreadable (being rather runny).
Magnolia petals infusing in honey
How to Make Magnolia Petal Honey (or use Agave syrup) 1. Gather your petals. 2. I rarely wash magnolia petals because I only harvest clean looking ones, which are from way above the ground but unsoiled by birds. You may like to wash yours. If so, then dry them off. 3. Tear the clean, surface dry petals into a sterile small glass jar. I use dishwasher cleaned pesto jars for this sort of thing. 4. Covered completely with runny honey. Use a chop stick or knitting needle to loosen trapped air bubbles. You may need to release the air and top up with honey several times. The jar should be filled to the brim with honey. The air bubbles won’t all leave the honey but prodding with chopsticks, helps them to escape and thus reduces the risk of contamination. 5. When no more air bubbles are escaping and no more honey needs to be added, close the jar tightly with its lid. 6. The constituents of the petals will infuse into the honey over the following days and weeks but the honey will take on a delicious Magnolia aroma and taste within a few hours. 7. Eat in any honey way (smear on bread, add to smoothies, mix with a little vinegar for an elixir, etc) you choose or take a teaspoon now and them to help soothe anxiety, sore throats or respiratory congestion. I don’t bother to strain this honey as I like the petal crunch. You could strain after 6 weeks if you preferred. It seems a waste of those petals though.
Please note that the herbal honey may start to ferment after a while, due to the high water content in the petals. Keep an eye on the jar, if it starts to bubble, the lid must be loosened to avoid pressure building up and the glass jar exploding. Storing it in a cool dark location will help to preserve its shelf life. Eating it all up will also avoid the problem 🙂
I hope that you get a taste for Magnolia petals this year and have a try at infusing them in honey, agave syrup, vinegar, vodka or olive oil. This herb is so beautiful, so giving and so tasty – it would be a pity to miss the fun completely wouldn’t it? I was looking at my favourite Magnolia at twilight this evening. It will open its blooms very soon and I will be waiting and thanking it for every petal.
Do you like it? Please do add a comment about your magnolia experiences at the foot of the page or fill in the contact form. I would love to hear how you get on with magnolia and what else you are keen to learn about!
Learn Urban Herbology If you want to learn more about foraging and using herbs in towns and cities, take a look at my apprenticeship course. I have helped hundreds of wonderful people learn about Urban Herbology over the years and I would love to help you on your journey!
Aurel Chaoul taught me how to really make water kefir a couple of years ago. One beautiful Beltane evening in the River of Herbs orchards, he showed a bewitched group of us how to set up a batch. He added chewed over apple cores, squeezed out lemons, bits of ginger, a liberal amount of caster sugar and whatever else felt good at the time. I have been hooked on it since and my recipes have become more experimental as I gained confidence with those little living grains. Ginger, Turmeric and Lemon is a firm favourite, reminding me of a Balinese Jamu but taking far less time to prepare. Ginger and lemon, is rather like ginger beer and basil tastes great with most fruits. Stinging nettle infusion, fed to kefir without any sweetener is another top experimental result in this house. It tastes rather like nettle beer and can be made overnight. It’s a complete bargain, especially if you like a slightly beery taste but not the alcohol. The nettle does tend to stain the kefir grains though, not really a problem unless you don’t want nettle in your next kefir batch.
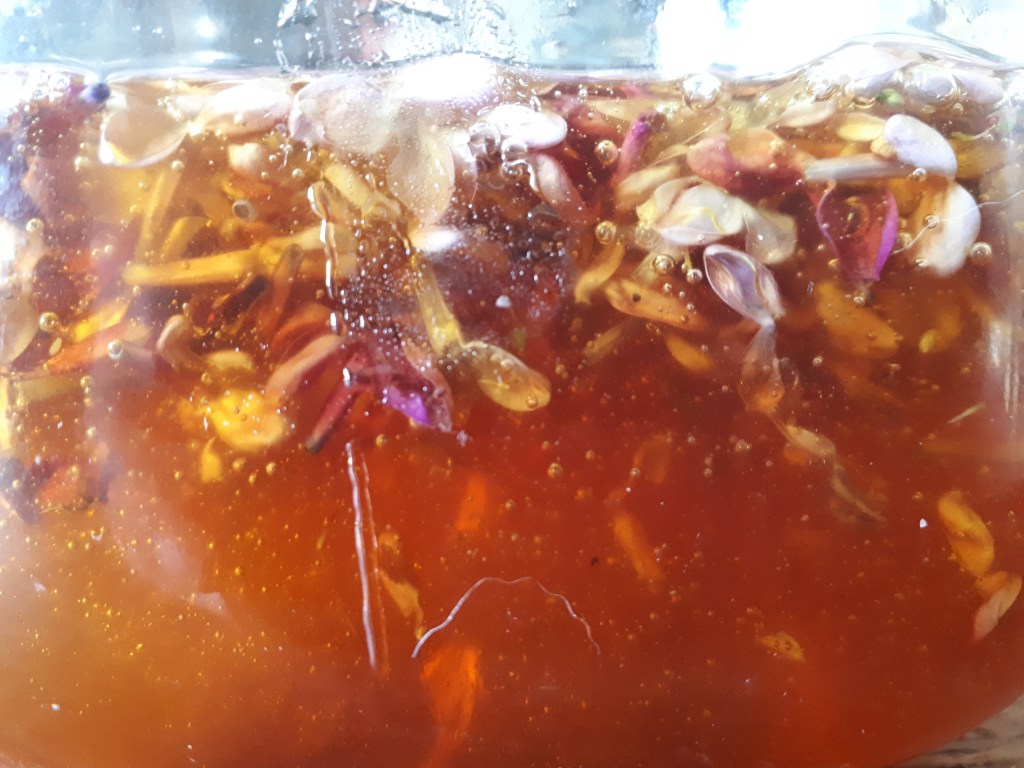
My autumn 2015 favourite is made from foraged rosehips, quince, lemon and honey. The rosehips here have been drying out whole over several weeks, on my dining room table. They looked so pretty when I harvested them and I didn’t feel like scooping out the itchy seeds for rosehip honey this year. So they sat around a candle and shriveled up gracefully. When added to the kefir brew, they perk straight back to life and look gorgeous again. Quinces are exquisite old fashioned fruits which I don’t find often in Amsterdam. However they are currently hanging in a perfectly pluckable state on a grand old tree in Frankendael orchards. Each time I garden there, I take a few home and invariably forget to cook them. They dry slowly in my fruit bowl and release an amazing pear-y fragrance, which is no bad thing. The Lemon is left over from mealtime wedges and the honey is because the kefir grains love a little sweetness to get them going. I find the combination a real pleasure to drink and it always goes down well with the orchard project volunteers.
If you enjoy experimenting with water-kefir and you like to forage, I’d love to know what your favourite combination is!
Let’s face it, some herbs are hard to swallow – not because they are chewy or toxic but because they just taste sooooo strong that they make your toes curl and your hair stand on end!
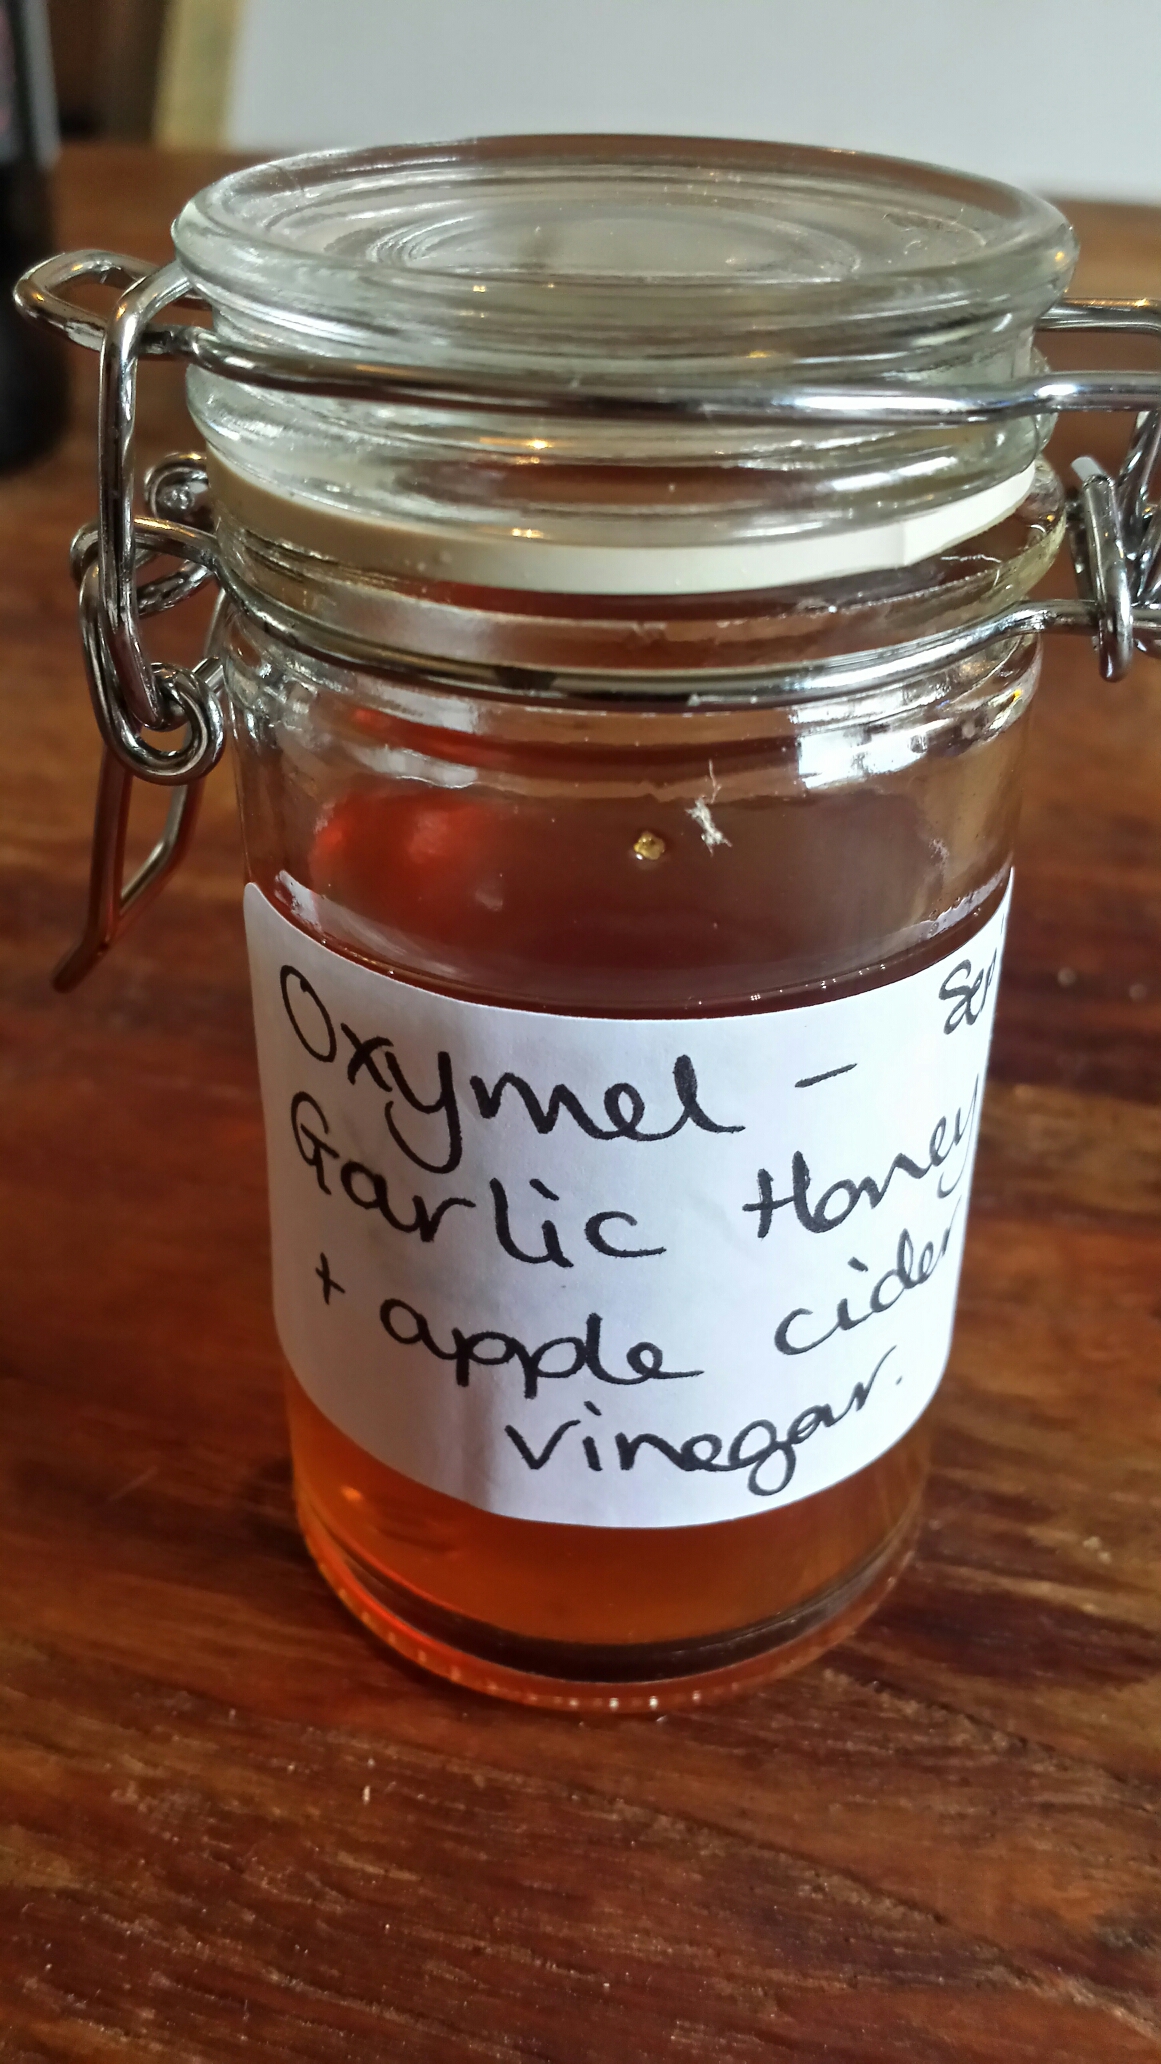
One solution to the issue of strong but necessary herbal taste, is to create an Oxymel. These are delicious concoctions which take just moments to prepare and have a good storage life. They are made from herbs, honey and vinegar, having a sweet and sour taste which detracts from strong flavours. Oxy- means acid, containing oxygen or contradictory. -mel means honey. I like to think of them as sweet contradictions. Oxymels combine the properties of the herbs, vinegar and honey from which they are made.
This morning I made some Oxymels with my Rowan apprenticeship group and the apprentices have plans to use them in salad dressings and food dips as well as for the traditional medicinal purposes. You may also like to devise pairs of herbs which work together, either culinary or medicinally. Ginger and garlic is such a combination.
The following is taken from my book which is still not finished!!
OXYMELS
Preparations of vinegar and honey, where at least one has been infused with herb.
The ratio is traditionally 5 parts honey to 1 part vinegar. A traditional method is to combine the honey and vinegar and simmer gently, along with the herb, until the mixture becomes very viscous, like treacle. However I don’t like to heat honey, I follow Ayurvedic advice never to heat it above body temperature. I prefer to infuse the vinegar and honey separately, for 6 weeks, then to combine them and leave them runny, no need to reduce to a thick consistency. If you have only one constituent infused, the vinegar or the honey, you will also be able to make a useful oxymel. If you have neither honey or vinegar infused, you can simply set up a vinegar and honey herbal infusion and wait up to 6 weeks before straining and storing.
Recipe (with pre-infused honey and/or vinegar)
1. Simply combine 5 parts runny honey (which may be previously infused with herb and strained) and 1 part apple cider vinegar (which may be previously infused with herb and strained).
2. Store in a sterile glass jar with non-metallic lid.
Recipe with fresh herbs
(In the absence of infused herbal vinegar or honey)
1. Fill a small glass jar with chopped fresh herb.
2. Make a non-herbal oxymel using the 5:1 guidelines above (e.g. 100ml honey and 20ml apple cider vinegar). Make enough to fill the jar to the brim as your fresh herb will infuse into this liquid.
3. Pour the delicious liquid over the chopped herbs.
4. Seal jar with a non metalic lid (to prevent the vinegar oxidising the metal).
5. Store for 6 weeks and then strain through muslin into another sterile glass jar.
6. Preserve the oxymel in this glass jar with a well fitting non metallic lid.
Storage
Long term but keep an eye on it. 1 year plus.
Dosage
1 teaspoonful a few times a day, of course depending upon the herb used.
Uses
Oxymels are a very useful way to disguise herbs which have tastes which many find hard to swallow. But they have also been used for millennia to create delicious drinks and deserts. A pleasant way to take them is a tablespoon mixed with a glass of soda water or plain water.
Suggested herbs
Garlic-ginger oxymel is a tasty combination or sweet, sour and spicy. I find it handy to keep in stock for colds, flu or as a sore throat gargle.
Peppermint, Sage, Thyme, Mugwort, Hyssop, Garlic (whole cloves), Onion, Ginger, White Horehound, Rosemary – each makes a good oxymel.
As ever, note which oxymels you have made, tried and what you think of them. Also record which proportions of vinegar to honey you have tried and found best. Only use herbs which you are certain are completely safe for you to use. If you are really sick, consult a doctor! I use my oxymels for simple ailments such as tickly throats.
No matter how much I know that a strong bitter taste is just what I need at a cetain time, it’s often very hard to swallow unless I can soften the blow to my tastebuds. Oxymels are one way to do this. I hope you enjoy them too.
If you would like to learn more about oxymels, perhaps you would like to sign up for my Kitchen Witchery workshop on 12th October 2015.
As some of you know, I fell from my bike in November and was out of action for quite some time. In short, I broke my cheek bone in several places, took quite a hit on my bum and was rather shaken up. Illness is one of the greatest teachers so naturally lessons were learned. I wrote a few of them down as the weeks went by and thought I’d emerge from hibernation today, to share some of the ways I used herbs and other things to aid recovery. I have tried to relate the story to the Wise Woman system of healing, just as I ask my apprentices to relate a health incident they have been through to the system.
Step Zero – Serenity medicine
For the first week I did nothing but allow my body to quietly sort itself out. The cut over my eye was quickly glued together in hospital as this was clearly necessary but the rest was left to calm down, in readiness for a facial reconstruction operation. No herbal ointments, no supplements, no infusions, nothing. The body’s powers of repair and regeneration are amazing. Stores of nutrients from deep within the body are called upon to fight the cause. There was clearly nothing to do except rest and sup on water, chicken soup, pumpkin soup and all manner of smoothies. The nutrients which are taken from the storehouses of the tissues must be replaced. Adding anything extra to my diet felt wrong at this point, even dangerous so I stayed away from everything other than plain food. My mental taste-buds were my guide.
Step One – Collect information I wanted to know several things:
1. How the accident had happened. It was a mystery and this was not helping me. It took three weeks to find out that a stone or similar must have wedged between the front wheel and mudguard, stopping the bike very suddenly. Knowing helped in some ways. Knowing that I am not able to prevent this happening again didn’t help. So I researched bike helmets. That helped. More people should wear one.
2. I wanted to know about the imminent operation. Without it my sight could be lost, with it I should look normal again. Risks of anesthetic, risks of not operating. Knowing helped.
3. I believe nothing happens by chance. Why did this happen at that moment? I searched, through dreamwork and visioning. I found answers. The answers are for me. That helped. I act on my findings.
4. Shaking, why did my body persist in shaking? Shaking is a natural response to trauma and I needed to welcome it. Whole schools of therapy revolve around it. This is an interesting field!
Step Two – Energy medicine The energetic body is an incredible part of us. It is us. When it disappears we disappear. To feel the flow of Nwyfre / prana / chi (whatever you want to name it) through a major chakra almost disappear and not return for weeks is a terrifying thing, speaking personally anyway! I was unable to correct this easily so a dear friend helped. Being aware that the energy body is out of balance is important. Knowing how to track it’s state and assist it’s return to balance is important.
Nourishing Comfrey – Boneknit
Step Three – Nourishment Let food be thy medicine. After the operation I incorporated Oatstraw infusion into my daily diet. One liter a day. This helped to soothe my nerves (they were rather frazzled). Motherwort tincture helped in this way also. Ten drops as and when needed to bring things into perspective again. I keep a green ointment in stock here at home for all manner of skin ailments. This was very helpful after the operation. I kept it away from the broken skin and used it with intention to seep into the skin and speed the bone and flesh healing. Comfrey within the ointment came into its own as I have never felt before. So soothing, healing, scar reducing and welcome. I trusted my thoughts on when to begin using it – not before the bone setting operation, not before the skin had stopped it’s healing fluid oozing. All had calmed before I used it. I did not wash my face for three weeks and then moved onto a regime of plain tepid water, then a little ointment here and there above the breaks plus the SJW oil mentioned below. My face was cut and grazed from my eyebrow to my collarbone. All marks went quickly, except for the super glued cut (which is not surprising). What money we waste on skin care preparations!
Another thing that nourished me was friends. They helped nourish me with food, books, cards and they nourished me by making contact in whatever way felt best. Nourishment on all levels! I must nourish my friends.
Step Four – Stimulate / Sedate When the cheekbone breaks the supplying nerve tends to be constricted and stops working so that side of the face becomes numb. This can remain permanently in some people, due to the way the bones heal, degree of nerve damage during the trauma etc. I was keen to avoid permanent nerve damage so as the bones began to feel more fixed I turned to St John’s Wort oil. This herb has an affinity to nerves and it was all I wanted on my skin other than the green ointment. Soon after I began working with the oil the nerve began to return to action. It was completely back to normal after 6 weeks.
Nadis Herb Shop, Ubud
Step Five – Supplements and Drugs Paracetamol seemed inescapable for me in the first weeks after the accident. I took paracetamol and codeine erratically. I don’t touch them usually but I wanted help. They certainly helped with pain but it was quickly clear that they could not remove the cause of the pain. This may sound obvious and of no consequence but for me it was something of an issue. When I took the pills I could sleep but it was not very restful sleep. It made me feel out of control, detached from myself and although it stopped my shaking, it didn’t stop the cause so when they wore off, the shaking and fear returned with a vengeance. I found other ways to deal with the worry and shaking eventually (Motherwort and Oatstraw) but if I had not realized that these would help, I imagine I would still have been taking the drugs. That’s not a comforting thought as most people don’t know about those simple herbs. It was also a learning experience in that by simply removing the worry, I could remove the pain.
We went on holiday three weeks after the accident, to Bali, not exactly a hardship and certainly an opportunity for herbal learning. I learned all I could about Jamu – traditional Indonesian medicine. During my quest I met Lilir, a generous herbalist at Nadi Herbal in Ubud. A bug bite on my calf had grown to the size of a tennisball overnight and I needed local herb advice. Lilir calmly applied a hot herb tea compress, applied some herbal antiseptic spray, advised me that Patchouli essential oil is a useful first aid antiseptic in the tropics, and then taught me about Sambiloto. I began a course there and then. What an amazing herb! Sambiloto or King of Bitters (Andrographis paniculata) is a herb competing (and combining) with Sweet Annie from the Artemisia family in the fight against Malaria and Dengue Fever. Get to know it. It could really help you out. I used it to make me less appetizing to the bugs. It is really incredibly bitter so Lilir recommends it in pill form and not at a high dose. I began with one pill a day for 14 days and then down to two pills a week.
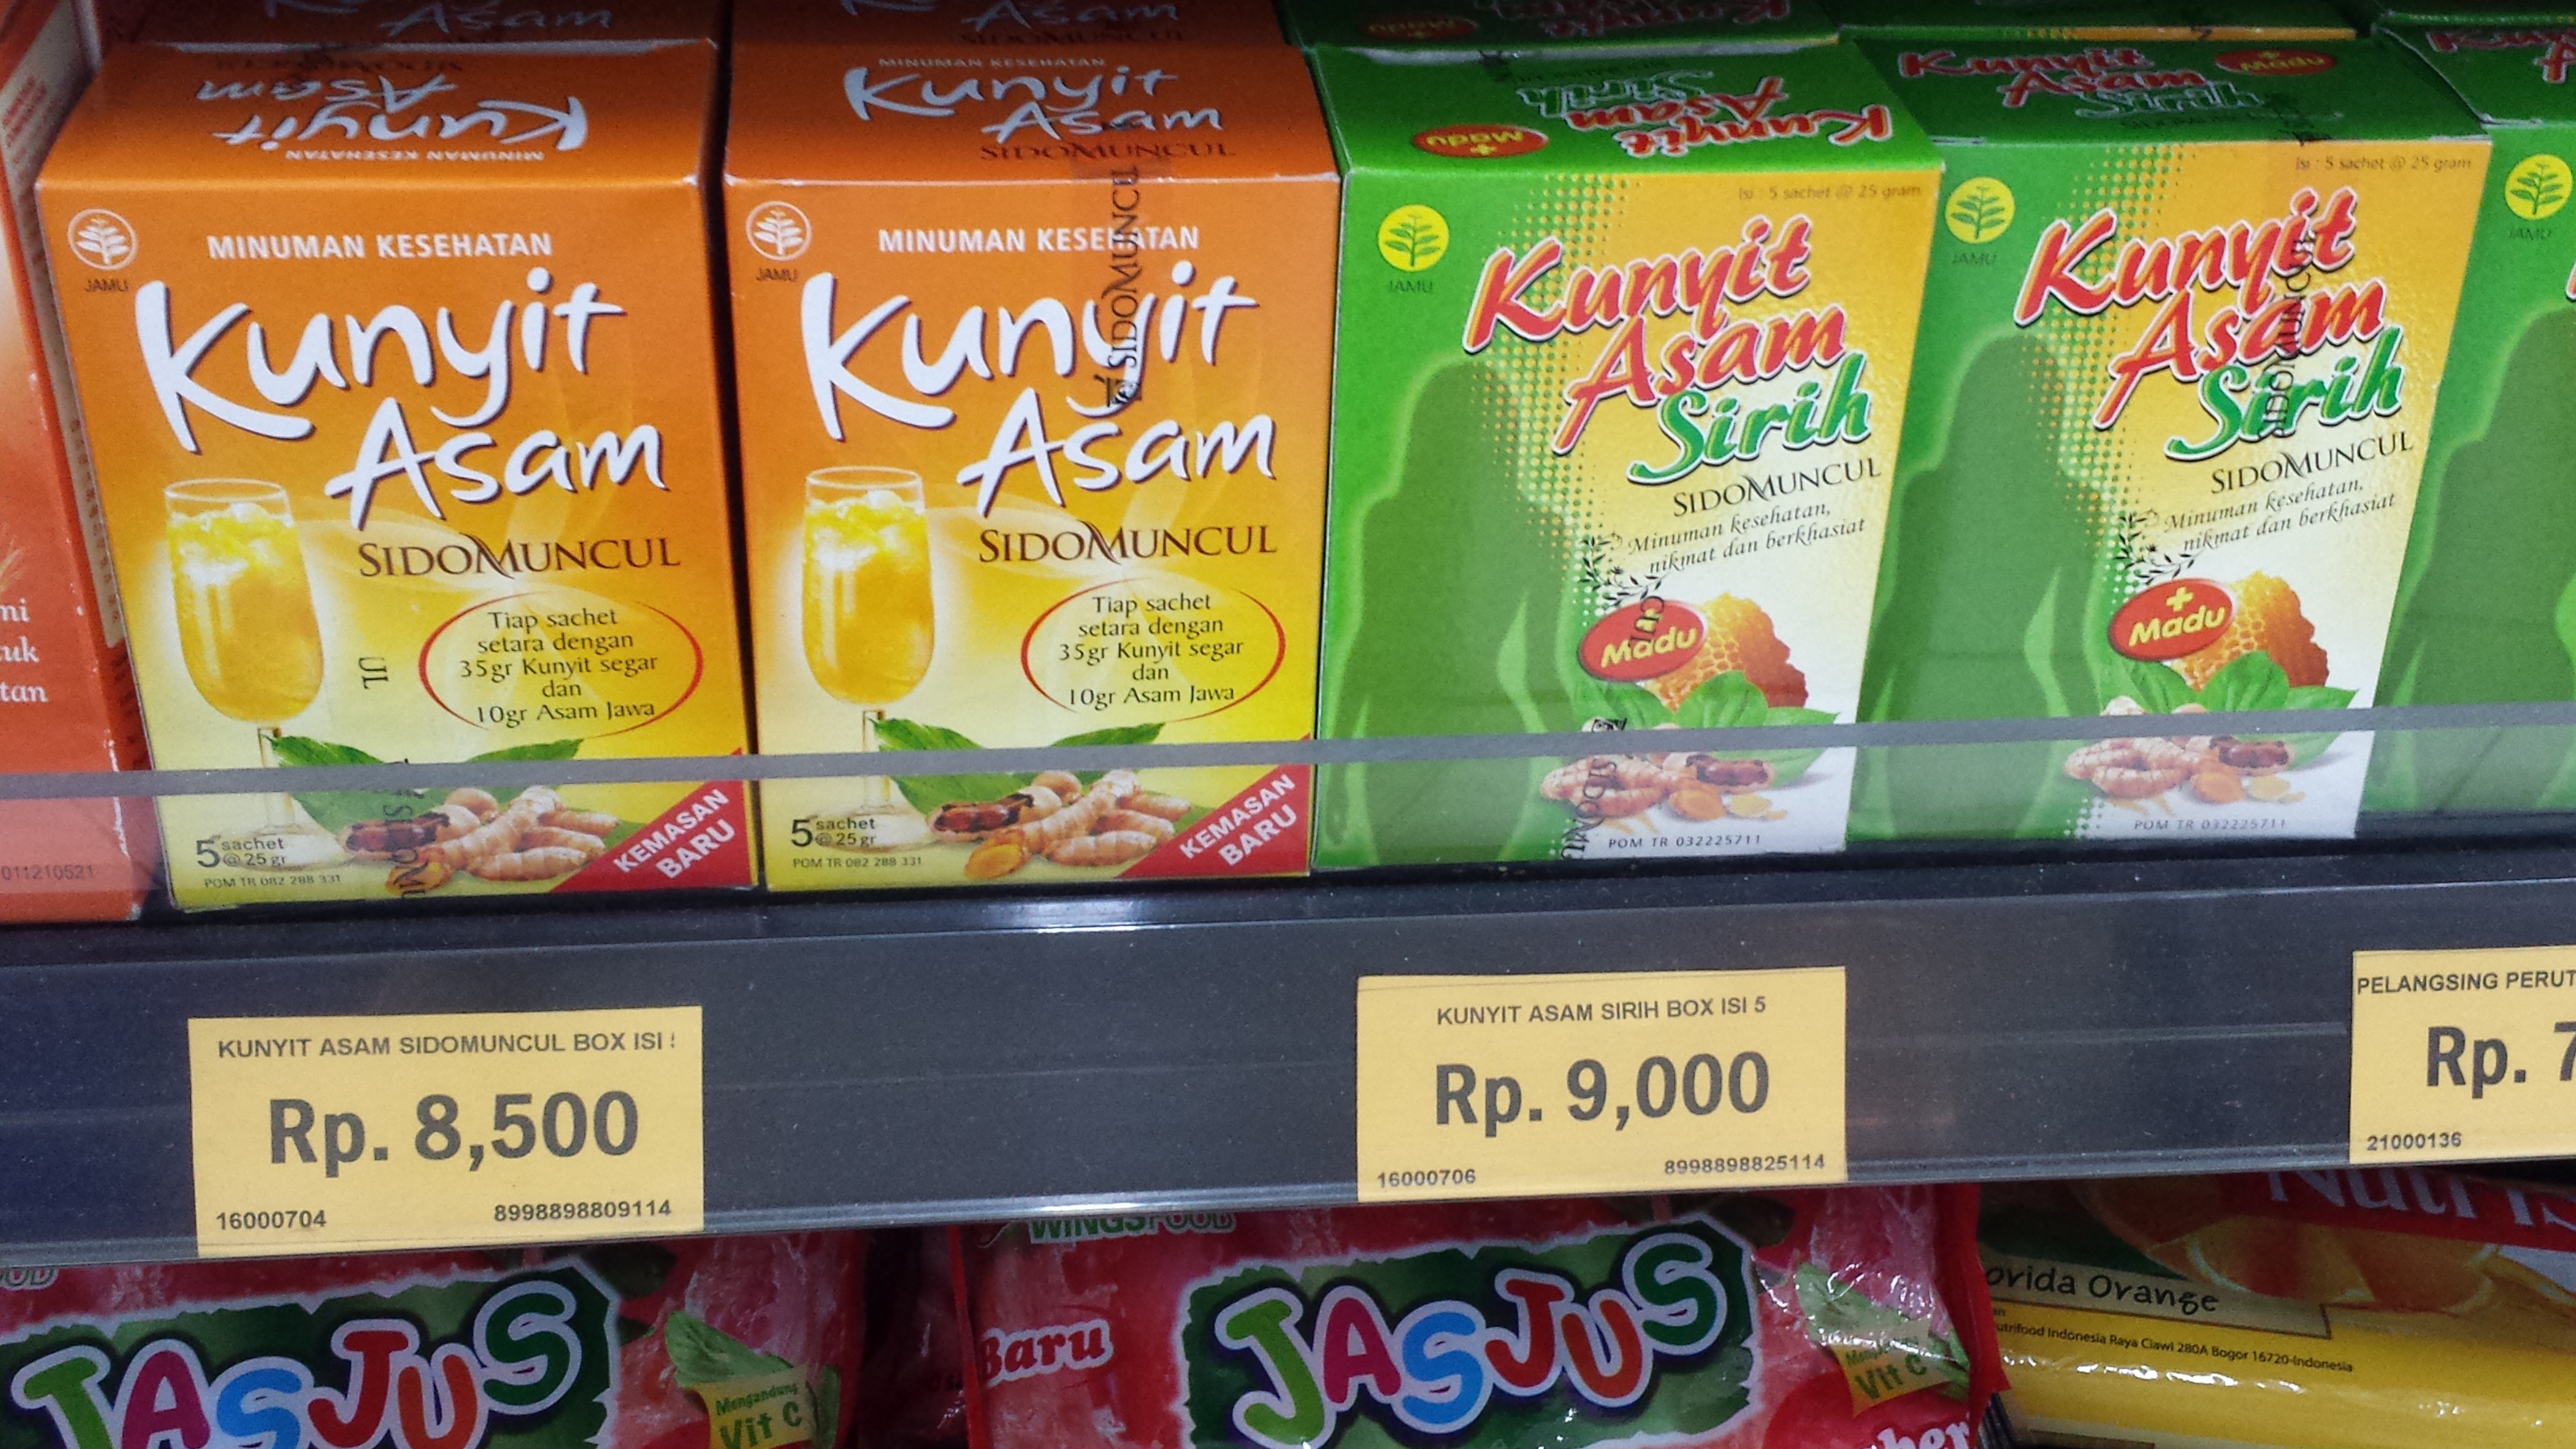
Another Jamu which I fell in love with is Kunyit Asam. I have learned how to make this at home and am trying to make a litre bottle of the orange wonder each week. It is a potent concoction of Turmeric, Tamarind, Galangal (or Ginger) and sweetened water. It has many useful properties and I treat it as a supplement to reduce inflammation and stimulate digestion. It is to be respected and should not be used by certain groups of people. Interestingly, powdered versions are available in Balinese supermarkets and chemist shops. I bought a few packets but find them super sweet and poor immitations of the freshly made potion. But it is good to see that there is demand for such a mass produced Jamu product. An interesting read if you want to know more about Jamu was written quite recently by Susan-Jane Beers.
Since returning to Amsterdam I have found a great source of fresh Turmeric rhizome and have been experimenting with homemade Mead, infused with Turmeric, Ginger and Lemon. So far so good!
Whilst I was researching various nasties which can be transmitted via tropical insect bites, I learned about natural ways to treat Dengue Fever. Fresh Papaya leaf appears to be a very promising remedy. Here is some interesting reading about it. In learning about that, I found out about how fresh Papaya fruit can help keep various intestinal bugs at bay. So Papaya also became part of my daily regime.
Step Six – Break and Enter
An operation was necessary in my case. It went very well and was less intrusive than it could have been but all operations are a shock to the system. Returning from the anesthetic was an unexpectedly “interesting” experience. Chanting a deeply ingrained Sanskrit mantra from the Upanishads on and on and on, whilst drinking in delicious oxygen did the trick – after a while. Mantras are very powerful, whatever they are and wherever they are from. Choose a powerful one and a positive one and one for which you know the words well. It helped me to focus and to shut out worrying thoughts. It brought me back down to Earth and made me breathe slowly and steadily. Thank you Ranju for teaching it to me all those years ago!
Arnica gel was also a useful remedy at this stage. I rubbed a little on my temples to lessen the shock to the body. Here in Amsterdam I buy a homeopathic Arnica gel called Eerste Hulp Gel. It is a combination, containing also Calendula and I find it very useful for shock.
Moving on
So that’s my Wise Woman style summary of my recent healing experience. Now my biggest issue is recounting the events each time I meet friends for the the first time in a while. They want to know and I want to tell but looking back is not always beneficial. My new response is simply to be – I am healing well.
Here at last is a quick recipe for Marlies van Wisselingh’s too simple to be true, teacher’s throat saving, cold and fever beating Ayurveda remedy – passed to her from a very helpful Indian man some years ago, in India. Her husband Bob is a volunteer with the River of Herbs and has been enthusiastically telling us all about this mysterious potion for ages!
I’ll try to place more detailed instructions on here at some point but until then…
Into a sterile 250ml canning jar sterile (e.g. Fido, Blokker €3), slice 2 organic lemons (peel and pips stay), peel and slice a huge piece organic ginger (12cm?) into the pot and add 2 teaspoons organic Turmeric powder. It is useful to alternate layers of lemon and ginger as you build up the contents of the jar. Then gently pour on runny honey. Use a chopstick to release air as you pour. Fill it to brim! Lid on. Refridgerate – leave to infuse for 3 months ideally, before sampling the concoction. Then due to the high water content (lemon and ginger juice) it is probably advisable to consume within a year. However, if you notice an unpleasant odour, bubbling (in a fizzy ferment type way), mould or anything else before that time then you should not consume it as a winter remedy. If mine begins to ferment I will gladly turn it into a bottle of mead.
This wierdly becomes a marmalade-y type concoction which appears to knock the socks off many brewing winter bugs. Have been using it on and off since September and am very impressed. Thank you Marlies!
Marlies takes it in a warm cup of water when needed. I have been using it straight from the pot, one teaspoon per dose.
Do let us know what you think of this simple Ayurvedic remedy.
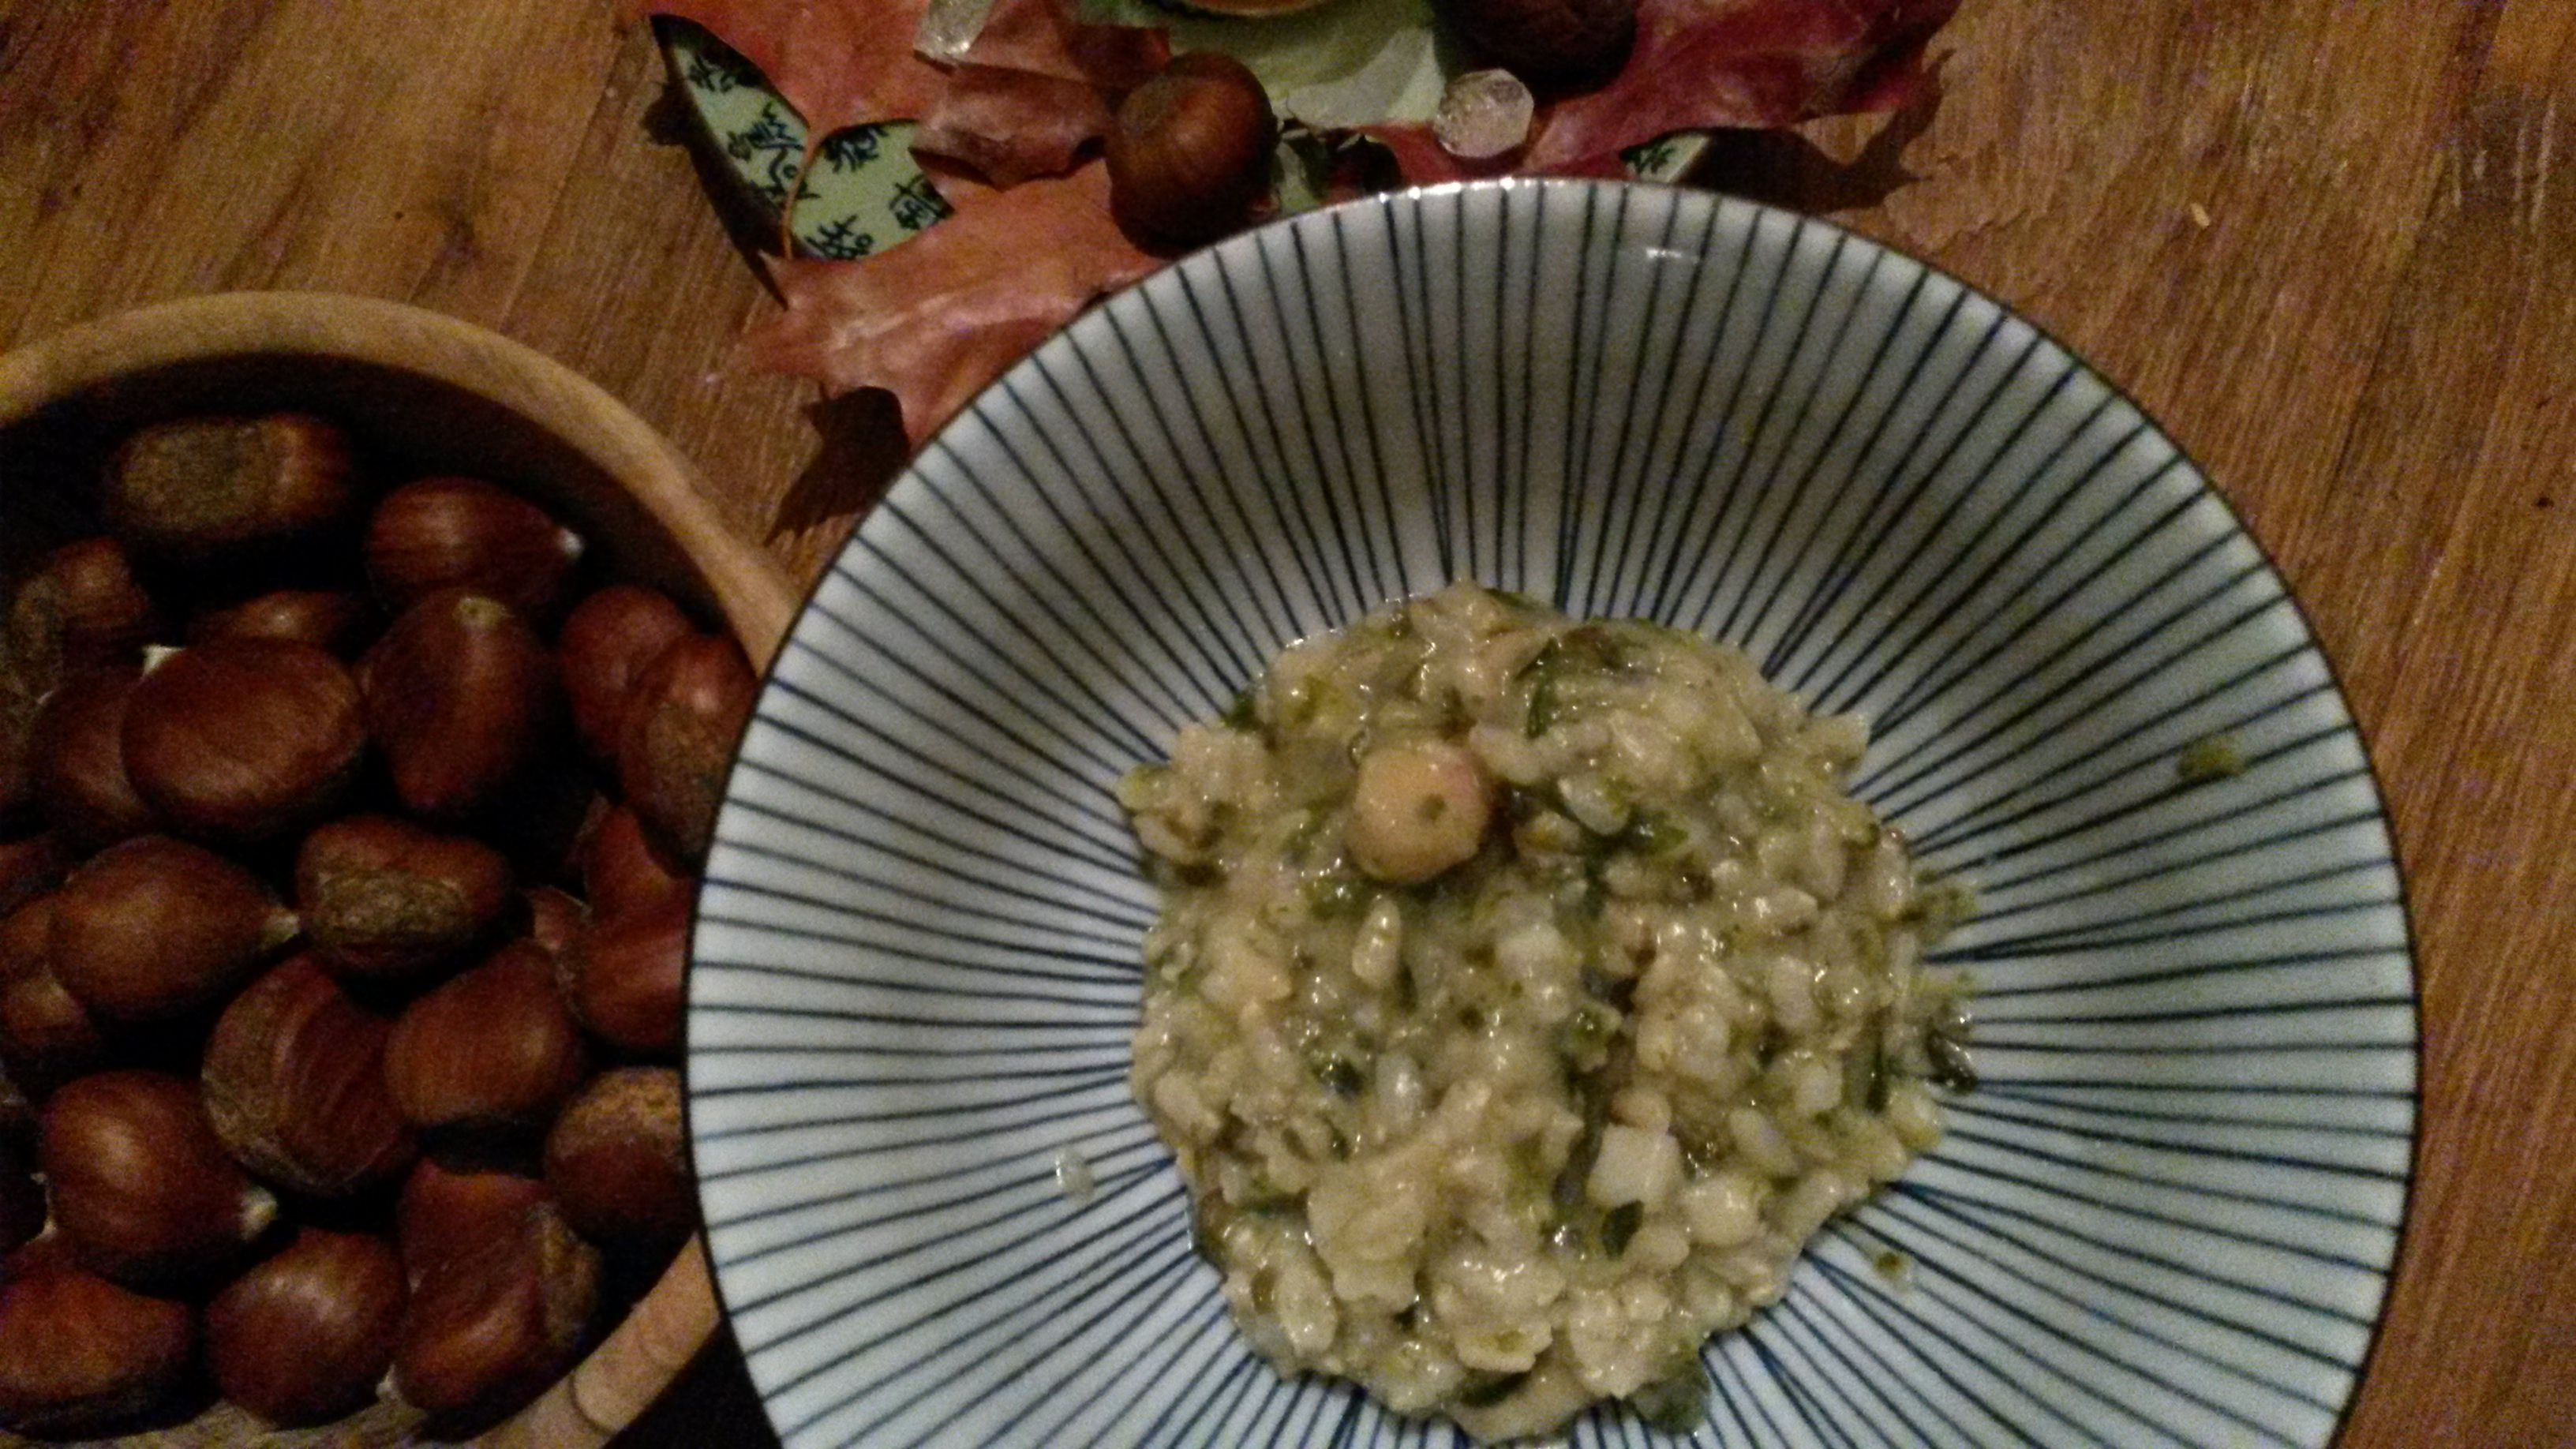
I learned on Saturday, from one of my Willow apprenticeship group, that many Japanese cooks like to peel Sweet Chestnuts when raw and add them to rice whilst it cooks. So today I tried it out and wow – what a sensation this cooking combination can create! I intended to take a huge portion of this risotto into work for tomorrow’s lunch. Umm, there is now only about half a portion left so must think again about lunch. This risotto uses sweet parsnips, sweet chestnuts and rice which is naturally on the sweet side. The other ingredients are savoury and the result is sweet savoury. Never again will I cook sweet chestnuts without thinking of rice first. These sweet chestnuts came to me as a gift – foraged in the east of The Netherlands – unfortunately I have not found them of this quality in Amsterdam, though I’m sure they exist!
So here is my latest wildfood recipe for…
Sweet Chestnut and Parsnip Risotto
(makes about 2 main dish sized portions)
1 cup risotto rice – I used wholegrain (non risotto rice will do, it just won’t become so creamy)
1 small onion, finely chopped
Oil or butter
Parsley, sprig finely chopped
1 large parsnip, finely chopped
1/2 organic chicken or vegetable stock cube or 1/2 cup of good stock added in place of hot water
6 -8 fresh sweet chestnuts, shell and skin peeled, then the creamy nut broken into rough pieces.
Seaweed – I used 1 frond of Dulse or equivalent, finely chopped.
A little Spinach, finely chopped (seasonally available local leaves would also have worked very well, e.g. Dandelion, Ground Elder)
Method
1. Gently fry the onion in a heavy based pan and when translucent add the dry, unwashed risotto rice.
2. Fry the rice in the onion, very gently, for a minute or so.
3. Add 1 cup of boiling hot water. Stir to prevent it sticking to base of pan and simmer steadily with the pan lid on.
4. Continue to stir breifly whenever you think about it.
5. Add the other ingredients to the pan and stir every now and again.
6. Add more hot water, cup at a time whenever you see the rice absorb the cooking water and the dish thickens up considerably.
7. Simmer and add water in this way until the rice is translucent and thoroughly cooked through.