Vrijwilligers gezocht: Voor het wekelijkse tuinonderhoud van de Stijltuin bij Huize Frankendael
Houdt u van tuinieren en wilt u deel uitmaken van een vrijwilligersteam dat zich inzet om van de Stijltuin bij Huize Frankendael een mooie, rustige en inspirerende plek te maken?
Lynn Shore en Tamara Last (die Engels en Nederlands spreken) zijn op zoek naar enthousiaste en toegewijde vrijwilligers om deze bekende tuin te helpen onderhouden en verbeteren. We zullen voornamelijk in de Stijltuin zelf werken en ook de bosgebieden ernaast netjes houden – alles in lijn met de elegantie en het erfgoed van de locatie.
Wanneer: Maandag 09:30 – 13:00 uur, het hele jaar door. (Vanaf maandag 2 juni 2025)
Wat doen we? Algemeen tuinonderhoud onder leiding van Lynn en Tamara. In het eerste jaar bestaat dit voornamelijk uit onkruid wieden en het verplaatsen van planten om gaten in de borders op te vullen. We zullen nieuwe planten kweken uit zaad en stekken. De prioriteit ligt bij het verbeteren van de esthetiek. Lynn en Tamara werken samen met de Vrienden van Frankendael aan een beplantingsplan dat past bij de tijd van Huize Frankendael. Zodat we straks een stijltuin hebben die prachtig aansluit bij de locatie en een genot is voor alle bezoekers.
Wie zoeken we? Enthousiaste mensen, bij voorkeur met enige tuinervaring, maar de wil om te leren en de inzet om de stijltuin weer mooi te maken door regelmatig deel te nemen, vinden we belangrijker.
Waar: De Stijltuin ligt direct achter Huize Frankendael, waar Restaurant Merkelbach gevestigd is – net binnen de hoofdingang van Park Frankendael, in de Watergraafmeer (Amsterdam Oost). Adres: Middenweg 72, 1097 BS Amsterdam.
Als dit u aanspreekt, neem dan contact op met Lynn (lynn.shore@gmail.com) om uw interesse kenbaar te maken.
We kijken ernaar uit om samen iets heel bijzonders te laten groeien!
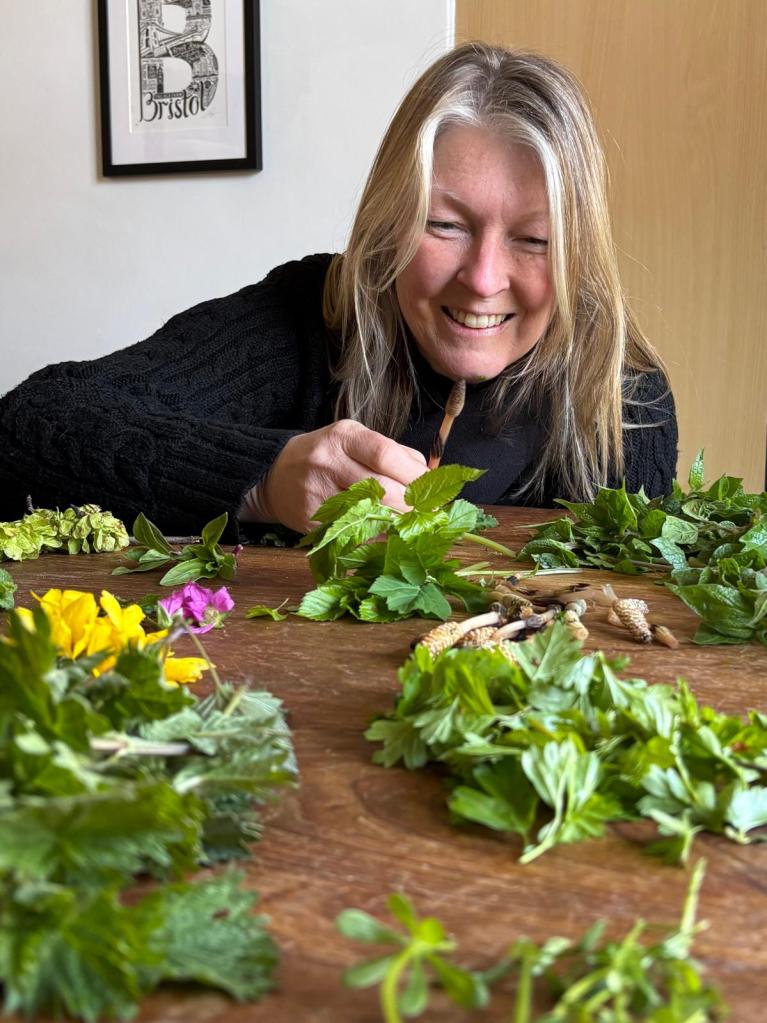
It’s just six days into the WildBiome Project month, and already my relationship with food feels transformed. I find myself eating far less than usual, not because of restriction, but because wild food satisfies in a different way – deeply, viscerally.
The WildBiome Project is a citizen science research initiative, organised by Mo Wilde and her daughter Caitlin, it brings together over 100 forager participants who are shifting their diets to primarily foraged and wild foods. The University of Bradford (UK) is working with the project, and explores how a need to live on ancient wild, local, famine foods might impact the health of modern humans. We’re tracking our health throughout, with start and end testing of gut microbiome, blood markers, and biometrics. We all keep a daily log of everything that we eat and drink. I am also tracking daily shifts in my mental and physical health.
There’s a stark difference between the wild greens and meats I’m eating now, and the shop-bought versions I’ve relied on in the past. Vegetables grown for mass production are often bred for size and uniformity, but in the process they’ve lost something essential: flavour, and likely nutrition too. In contrast, wild foods are packed with intensity – smaller, perhaps, but potent, rich, and alive.
The act of collecting all of my green food myself has also changed my experience entirely. There’s an intimacy that forms when you forage – a kind of sacred attention. I know this week but this week I’ve found myself spending more time with each ingredient, observing where it comes from, how it grows, how it feels to pluck it from the earth or the tree. This relationship is further deepened when it comes to wild meat.
This week I prepared and ate wild meat – deer shoulder, and duck breast. Both being lean, nuanced in taste, with far less fat than farmed meat. I could sense the creatures in the process, which brought a kind of ceremonial reverence to the act. From the moment of deciding to cook them to the careful seasoning with wild herbs, I gave full attention. I wanted nothing to be wasted. Even as a previous vegetarian, who’s long considered herself a very thoughtful consumer, this experience felt markedly different. The sterility of supermarket meat – even the organic kind – is incomparable to the energy that remains in wild flesh.
I visited my father-in-law during the week, a drive that winds through mile upon mile of Dutch farmland. The landscape is functional, but stark: wide-open fields of monoculture grasses, scattered blue feed containers, massive sheds filled with chickens. You hardly see a tree sometimes, let alone biodiversity. It’s efficient – but eerily empty. In contrast, the wilder parts of the landscape – the wetlands, reedbeds, patches of woodland – teem with life: deer, wild boar, rabbits, geese.
I deeply respect farmers and all they endure. This isn’t about blame or judgement. But it’s hard not to notice how skewed our system is – how difficult it is for most city folk like me to access ethically sourced wild meat. And, how disconnected most of us are from the life that sustains us. Imagine a landscape where more people ate far less meat, but what little they did eat came from the land itself – wild, respected, shared.
I’m also learning to appreciate the value of modern food preservation. My little freezer is now filled two-thirds with wild food – a security blanket of sorts. But I’m also aware of how vulnerable it is. A power cut, due to cable laying or drain repairs in my area, could erase all that effort. So I’m thinking ahead. I have plenty of dried foraged herbs, and locally harvested nuts (those thanks to a more forward planning friend) but I’m lacking wild pickles, dried mushroom and more – I’ll definitely remedy this for next year.
This autumn, I plan to forage more rosehips, blackberries, and nuts. I’ll dry mushrooms and grind them into powder, press roots and greens into pastes and condiments, collect grass seeds to winnow and cook, and build a pantry that doesn’t depend so heavily on electricity. These preserved foods will support not just me, but my family – Frank and Livvy already enjoy wild foods integrated into our regular meals. But I want to go further: I want wild food to be abundant and delicious enough that they can choose whole meals from it, not just flavour boosts.
I’ve also been shifting away from wheat. I already use organic spelt, which feels gentler on my gut, but I’m now using chestnut and acorn flours – rich, earthy, and gluten-free. They won’t replace everything, but they open up new textures and tastes. And they are available from Amsterdam street trees. A more feral kind of baking.
One final joy this week: goose eggs. I’ve been fortunate to connect with a group licensed to collect them (Eigenkracht voer) – part of an effort to manage populations in a wetland area close to Schiphol airport. Rather than shooting or gassing, they use a more humane method: nest-emptying. They carefully remove eggs from accessible nests by boat, leaving one or two in each nest. The process is regulated, seasonal, and animal-conscious. Goose egg collecting was in season until the end of March, and I was able to get a basketful – they’re the equivalent of two chicken eggs each, and utterly delicious.
There are still three weeks to go on this WildBiome journey, but I’m already planning beyond. I won’t continue eating 100% wild – not while I live in the heart of Amsterdam, surrounded by incredible global cuisine that I still want to enjoy occasionally. But I will rebuild my pantry. I want the backbone of my diet to be wild, local, environmentally sound, and deeply nourishing. A way of participating in the land I live on, not just consuming from it.
This isn’t about perfection. It’s about connection. It’s about weaving food, place, and life together – one meal at a time.
Wil je weten welke eetbare en medicinale planten er in Amsterdam te vinden zijn op verschillende tijden van het jaar? Wil je weten hoe je jouw dieet gratis kunt aanvullen met lokale planten? En wilt u weten hoe de lokale giftige planten zijn? Geweldig! Ga dan met mij mee voor een wandeling in Park Frankendael en laat mij je laten zien wat er in de buurt is; Leer hoe je heerlijke en voedzame planten kunt identificeren, hoe je ze op ethische wijze kunt oogsten en hoe je ze kun gebruiken.
Wildpluk wandeling De wandeling start en eindigt op dezelfde locatie, bij de fietsenrekken die het dichtst bij Huize Frankendael/Restaurant Merkelbach liggen. We wandelen door het bos, langs water, op gras en andere plekken in het park, inclusief de tuinen waar je voedsel kunt verzamelen die ik sinds 2014 samen met andere vrijwilligers heb onderhouden. De wandeling gaat door bij alle weersomstandigheden, behalve bij stormen. Je ontvangt een hand-out om je te helpen de planten en toepassingen te onthouden, en we drinken kruidenthee van kruidenvondsten. Als je wat verzamelde vondsten mee naar huis wilt nemen, neem dan een klein papieren of katoenen zakje mee om wat kruiden en zaden mee naar huis te nemen. De wandeling is rustig en vrij langzaam, de paden zijn grotendeels natuurlijk, van houtsnippers of aarde. Er is een openbaar toilet in het park. Kom voorbereid om eenvoudig verbinding te maken met de stedelijke natuur.
Jouw wildpluk docent Mijn naam is Lynn Shore, ik geef al meer dan 15 jaar les in stedelijke wildpluk- en zelfvoorzienende vaardigheden in Amsterdam. Ik ben een ervaren kruidkundige en een trots lid van de Association of Foragers, en een Trustee van The Herb Society. Door de jaren heen heb ik wandelingen geleid voor grote en kleine groepen (waaronder Greenpeace), gewerkt met topbarmannen, restaurants, milieuvriendelijke bedrijven en gemeenschapsgroepen.
Deze april doe ik mee aan het Wildbiome onderzoeksproject, waar ik een maand lang alleen van geplukt en wilde voedsel zal leven om de effecten op het lichaam te bestuderen. Ik heb speciale interesses in het verbeteren van de stedelijke voedselzekerheid en mentale gezondheid door middel van natuurverbinding. Ik woon heel dicht bij Park Frankendael en ken de planten hier op mijn duimpje!
Deze wandeling is in het Engels. Ik spreek ook Nederlands. This walk is in English and Dutch.
Boekingsinformatie Om uw boeking veilig te stellen, kunt u mij een e-mail sturen op urban.herbology.lynn@gmail.org om te controleren of er ruimte is. Betaling dient voorafgaand aan de wandeling te worden gedaan op bankrekening NL41 SNSB 0705 8981 99 (LM Shore). Stuur een e-mail naar urban.herbology.lynn@gmail.com, in geval van vragen, of neem gerust contact met mij op via 06 275 969 30.
Annuleringsbeleid Betalingen worden volledig terugbetaald tot 24 uur voor het evenement. Als u na die tijd moet annuleren (dus minder dan 24 uur voor de starttijd van het evenement), kan er alleen een terugbetaling worden gedaan als we uw plaats met iemand anders kunnen opvullen.
Would you like to know which edible and medicinal plants are possible to find in Amsterdam at different times of the year? Want to know how to supplement your diet for free from local plants? And would you like to know how the local poisonous plants? Great! Then, join me for a walk in Park Frankendael and let me show you what’s around; Learn how to identify delicious and nutritious plants, how to ethically harvest them, and how to use them.
These Walks The walk will start and end at the same location, near the bike racks closest to Huize Frankendael/Restaurant Merkelbach. We will walk in the woods, alongside water, on grass and other areas of the park – including the foraging gardens which I have nurtured with other volunteers, since 2014. The walk will go ahead in all weather except storms. You will receive a handout to help you remember the plants and uses, and we will drink herbal tea from herbal finds. If you want to take some foraged finds home, please bring along a small paper or cotton bag to take home some herbs and seeds. The walk is gentle and fairly slow, the paths are mostly natural, of woodchip or soil. There is a public toilet in the park. Come prepared to connect simply with urban nature.
Who am I? My name is Lynn Shore, I have been teaching urban foraging and self-sufficiency skills, in Amsterdam for over 15 years. I am an experienced herbalist and a proud member of the Association of Foragers, and a Trustee of The Herb Society. Over the years, I have led walks for large and small groups (including Greenpeace), work with top bartenders, restaurants, eco-friendly businesses, and community groups.
This April I am take part in the Wildbiome research project where I will live only on foraged food for the month to study the effects on the body. I have special interests in improving Urban Food Security, and mental health through nature connection. I live very close to a Park Frankendael, and know the plants here like the back of my hand.
This walk is in English – I also speak Dutch.
Booking Information To secure your booking, please email me at Urban.herbology.lynn@urbanherbology.org to check there is space. Payment should be made in advance of the walk to bank account NL41 SNSB 0705 8981 99 (LM Shore). Email urban.herbology.lynn@gmail.com, in case of questions, or contact me on 06 275 969 30.
Cancellation Policy Payments are fully refundable up to 24 hours before the event. If you need to cancel after that time (so less than 24 hours before the event start time) a refund can only be made if we can fill your place with someone else.
Would you like to know which edible and medicinal plantsare possible to find in Amsterdam in the middle of winter? Want to know how to supplement your diet for free from local plants? How to make simple remedies and first aid treatments from them? And would you like to know about the local poisonous plants? Great! Then, join me for a walk in Park Frankendael and let me show you what’s around, even in the colder part of the year; Learn how to identify delicious and nutritious plants, how to ethically harvest them, and how to use them.
January Walks – Choose from: Sunday 12th January 11.00 – 12.30 – Park Frankendael (Full – Contact to join the Waiting List) €15 per person and Wednesday 22nd January 10.00 – 11.30 – Park Frankendael €15 per person
The walks will start and end at the same location, near the bike racks closest to Huize Frankendael/Restaurant Merkelbach. We will walk in the woods, alongside water, on grass and other areas of the park – including the foraging gardens. The walk will go ahead in all weather except storms, so dress for it 🙂 You will receive a handout to help you remember the plants and uses afterward and we will drink herbal tea from herbal finds. If you want to forage, please bring along a small paper or cotton bag to take home some herbs and seeds. The walk is gentle and fairly slow, the paths are mostly natural, of woodchip or soil. There is a public toilet in the park. Come prepared to connect simply with urban nature.
Who am I? My name is Lynn Shore, I have been teaching urban foraging and self-sufficiency skills, in Amsterdam for over 14 years and have been running a city foraging garden for the past 10 years. I am a fully qualified herbalist and a proud member of the Association of Foragers. Over the years, I have led walks for large and small groups (including Greenpeace), work with top bartenders, restaurants, eco-friendly businesses, and community groups. This coming April I will take part in a research project where I will live only on foraged food for the month to study the effects on the body. My Master of Public Health degree specialised in Urban Food Security and all of my work aims to connect city people with nature – to improve health, wellbeing and the environment. I am passionate about this and love teaching others how to do it. This walk is in English – I also speak Dutch.
Booking Information Payment is by bank transfer to account NL41 SNSB 0705 8981 99 (LM Shore). Payment is required to secure your booking. Please Email urban.herbology.lynn@gmail.com to book or in case of questions.
Cancellation Policy Payments are fully refundable up to 24 hours before the event. If you need to cancel after that time (so less than 24 hours before the event start time) a refund can only be made if we can fill your place with someone else.
Join Lynn Shore, professional forager and herbalist, to explore local nature as we approach Samhain.
SATURDAY 26th OCTOBER 10.00 – 12.00 – Park Frankendael €30 per person
On this 2-hour gentle walk, we will look to local plants, animals and other life forms, for signs of Samhain. That is the cross-quarter day between the Autumn Equinox and Winter Solstice. It is seen by many as the start of the Pagan New Year. It is the time when the wild hunt is said to rip through the world, and certainly, it can be a time of spectacular changing weather. Samhain is a time of reflection, inwardness, mushrooms and roots (both the plant and family kind).
You will learn about Local wild creatures, edible and medicinal plants Signs in nature as the seasons change Wild and feral Amsterdam plants How to identify, harvest and safely use local herbs Ways to help local wildlife Increasing your connection to place and self-reliance Simple rituals to bring yourself closer to urban nature at Samhain
What to expect This small group walk will be 2 hours long, starting and ending at the same location, near the bike racks closest to Huize Frankendael/Restaurant Merkelbach. We will walk in the woods, alongside water, on grass and other areas of the park. The walk will go ahead in all weather except for storms, so dress for the occasion and check for updates if we get storms. There will be opportunity to walk barefoot, but no pressure if you prefer not to. There will be a handout to help you remember things afterwards and we will drink herbal tea from herbal finds. If you want to forage, please bring along a small paper or cotton bag to take home some herbs and seeds. The walk is gentle and fairly slow, the paths are mostly natural, of woodchip or soil. We will sit outside to drink herbal tea and eat the wild snack. There is a public toilet in the park. Come prepared to connect simply and more deeply to urban nature.
About your guide Lynn is an experienced herbalist and professional forager, who is specialized in local herbs and reconnecting city people to nature. She has been teaching foraging in Amsterdam and helping city people become more self-reliant for 14 years, and has been a practicing herbalist for over 20 years. Her special interest is improving mental health through herbs and nature. Lynn set up the beautiful community foraging gardens, over 10 years ago, in Park Frankendael. Part of this walk will be in there. In April 2025, she’ll be participating in the Wildbiome project, eating only wild food for one month, as part of a research project investigating how wild foods affect our health.
Booking Email urban.herbology.lynn@gmail.com to book your place. When payment is received, your place will be confirmed by email. Please see the fair cancellation policy on the Events page.
Join Lynn Shore, professional forager and herbalist, to explore local nature on the autumn equinox.
SUNDAY 22nd SEPTEMBER – Fully Booked 14.00 – 16.00 – Park Frankendael €30 per person – Full booked waiting list only through Meetup not email.
On this 2-hour gentle walk, timed when the sun should be at its peak, we will look to local plants and animals for signs of balance and change, on the autumn equinox. This is the time when light and day hang in balance. From now till midwinter the nights get longer, days get shorter and nature turns inward. This is traditionally, the last day of the year to harvest some plant material and the start of harvest time for others.
You will learn about Local wild creatures, edible and medicinal plants Signs in nature as the seasons change Wild and feral Amsterdam plants How to identify, harvest and safely use local herbs Ways to help local wildlife Increasing your connection to place and self-reliance Simple rituals to bring yourself closer to urban nature through autumn
What to expect This small group walk will be 2 hours long, starting and ending at the same location, near the bike racks closest to Huize Frankendael/Restaurant Merkelbach. We will walk in the woods, alongside water, on grass and other areas of the park. The walk will go ahead in all weather except for storms, so dress for the occasion. There will be opportunity to walk barefoot, but no pressure if you prefer not to. There will be a handout to help you remember things afterwards and we will drink herbal tea from herbal finds. If you want to forage, please bring along a small paper or cotton bag to take home some herbs and seeds. The walk is gentle and fairly slow, the paths are mostly natural, of woodchip or soil. We will sit outside to drink herbal tea and eat the wild snack. There is a public toilet in the park. Come prepared to connect simply and more deeply to urban nature.
About your guide Lynn is an experienced herbalist and professional forager, who is specialized in local herbs and reconnecting city people to nature. She has been teaching foraging in Amsterdam and helping city people become more self-reliant for 14 years, and has been a practicing herbalist for over 20 years. Her special interest is improving mental health through herbs and nature. Lynn set up the beautiful community foraging gardens, over 10 years ago, in Park Frankendael. Part of this walk will be in there. In April 2025, she’ll be participating in the Wildbiome project, eating only wild food for one month, as part of a research project investigating how wild foods affect our health.
Booking – only through waitlist on Meetup now as event is full Email urban.herbology.lynn@gmail.com to book your place. When payment is received, your place will be confirmed by email. Please see the fair cancellation policy on the Events page.
Join Lynn Shore for a late summer herb foraging walk around one of the tastiest parks in Amsterdam.
THURSDAY 5TH SEPTEMBER
10.00 – 11.45 – Park Frankendael
€20 per person
We will look at many different edible and medicinal plants, which grow in and around Amsterdam. Learn how to identify, ethically harvest and safely use the plants for health, connection to place and to increase urban self-reliance, whilst caring for the environment.
This small group walk will be 90+ minutes long, starting and ending at the same location, near the bike racks closest to Huize Frankendael. We will look at herbs which live in the woods and alongside local roads and water. There will be a handout to help you afterwards and we will drink herb tea from some of our finds. Bring along a small paper bag to take home some herbs to help you to connect more deeply to local nature.
This will be during the end of the main foraging season so expect to take home plenty of foraged herbs and ideas about how to use and eat them.
Lynn is an experienced herbalist and professional forager, who specialises in local herbs and connecting people to the nature which we are all part of – especially in the middle of a city. She has been teaching foraging in Amsterdam and helping city people become more sufficient for 14 years. Her special interest is improving mental health through herbs and nature. Lynn set up the beautiful community foraging gardens, over 10 years ago, in Park Frankendael. Part of this walk will be in there. In April 2025, she’ll be participating in the Wildbiome project, eating only wild food for one month, as part of a research project investigating how wild foods affect our health.
Email urban.herbology.lynn@gmail.com to book your place. When payment is received, your place will be confirmed by email. Please see the cancellation policy on the Events page.
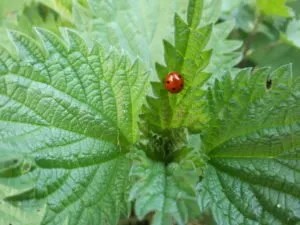
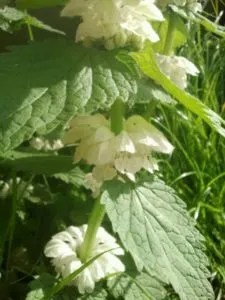
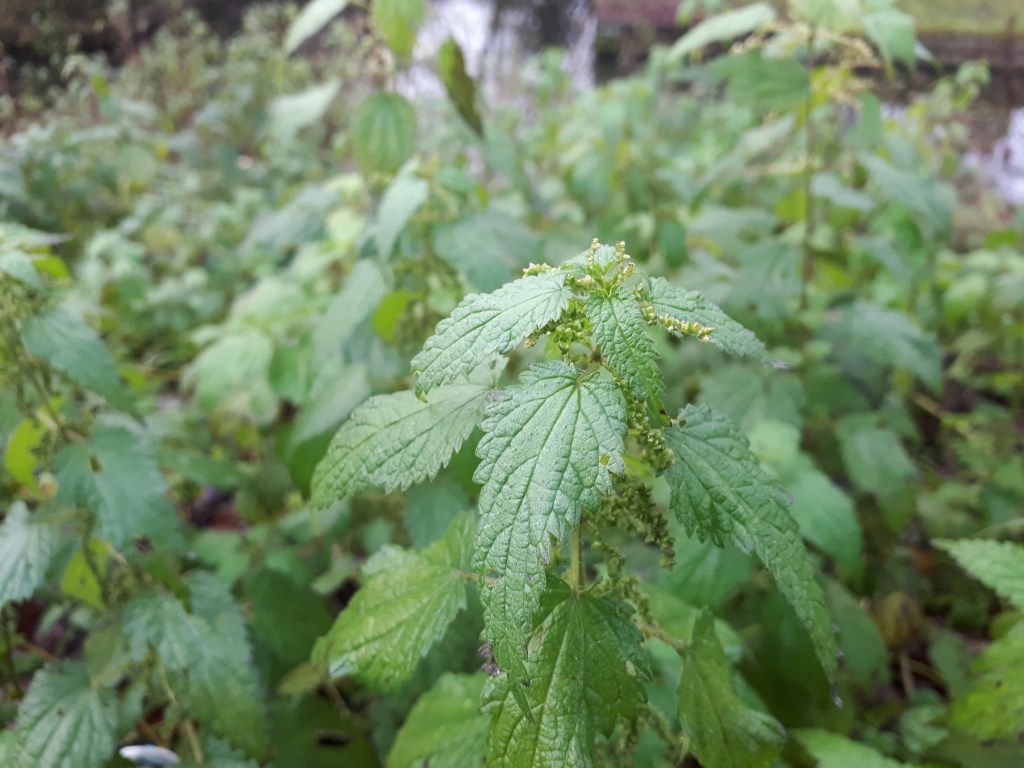
It is nettle time! Learn how to identify, ethically harvest, craft, eat, grow, use and generally make the most of locally growing nettles, so Stinging nettles (Urtica species) and several Deadnettles (some of the Lamiaceae family), with Livvy de Graaf, assisted by Lynn Shore. Lynn is a professional foraging teacher (member Association of Foragers) and consulting herbalist. Livvy, is Dutch-British and has been harvesting and eating wild food for longer than she can remember. She is Lynn’s daughter and certainly knows her way around the woods and foraging orchards, where this event will take place. She looks forward to sharing some of her skills with you. The walk will be primarily in English.
Location We will be working mainly in the River of Herbs foraging gardens, which Lynn has run for over 10 years, so unusually will be able to dig up some of the stinging nettle roots, to plant elsewhere or for you to cook/preserve/process at home. Meeting at main entrance of Park Frankendael, closest to Middenweg 72, Amsterdam (Restaurant Merkelbach / Huize Frankendael).
Handout Written info and recipes will be provided. You will learn about and try different preparations made from the focus plants (including a cup of tea). You will then be able to make your own potions/creations at home, using what we forage together and the handout.
Who is Stinging nettle’s sister?Yellow deadnettleStinging nettle
The plants Different “nettles” are up and forageable in Amsterdam all through the year, but at this time the Stinging nettles are growing strongly, and different Deadnettles begin to flower. This is the best time to start using them in simple remedies and to enrich food. As you learn about Stinging nettles and Deadnettles, you will also meet some other amazing wild herbs that are around at the same time. For instance, wild garlic is also in full growth at this time, so you will be able to dig some of those bulbs up, from legal places, if you want that and have uses for them.
Please bring along cup/mug paper bag (grocery small bag to take the harvest home) pen/pencil to add to the notes. hand trowel / handschep (we will have a few to share if you don’t have one).
Booking €15 per person, paid in advance Please email to reserve your place and receive the bank details for pre-payment. Your place is secured when your payment has been received.
Cancellation policy 100% refund if cancellation more than 24 hours before event start time. Cancellation after that time (so less than 24 hours before the start time) can only be refunded if we can fill your place with another person.
Extra Date: Saturday17th February, 10.00 – 11.30, Park Frankendael. Amsterdam
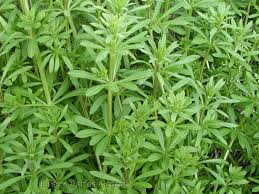
This is an event for wild garlic lovers!
Learn how to identify, ethically harvest, craft, eat, grow, use and generally make the most of wild garlic (Allium ursinum) or Daslook, with Livvy de Graaf, assisted by Lynn Shore, professional foraging teacher and herbalist. Livvy, is Dutch-British and has been harvesting and eating wild food for longer than she can remember. She is Lynn’s daughter and certainly knows her way around the woods of Park Frankendael, where this walk will take place. She looks forward to sharing some of her skills with you.
We will be working mainly in the River of Herbs foraging gardens, so unusually, will be able to dig up some of the fresh wild garlic bulbs, to plant elsewhere or for you to cook/preserve at home.
Handout with wild garlic info. and recipes, and a cup of herb tea will be provided. You will learn about and try different preparations from sweet, sour, savoury to medicinal. And will be able to make your own potions/creations at home, using what we forage together and the handout.
Wild garlic emerging from the early spring soil, heralds the start of the main foraging season. As you learn about wild garlic, you will also learn to recognise other amazing wild herbs which are around at the same time.
Please bring along: drinking cup Paper bag (grocery small bag to take the harvest home) pen/pencil to add to the notes. hand trowel / handschep (I will have a couple to share if you forget or don’t have one).
Cost: 15 Euro per person – Payable in advance Please email urban.herbology.lynn@gmail.com and you will receive the bank details for payment. When payment is received your place is booked.
Cancellation Policy: If canceling, for any reason, 24 hours or more before the start of the event – Full refund. If canceling after that time (so less than 24 hours before the start time of the event) you will be refunded only if we have a replacement.